This repository contains the source code for the YouTube looper extension.
You can install the extension from the Chrome Web Store.
The extension adds a new button into the YouTube player video toolbar:
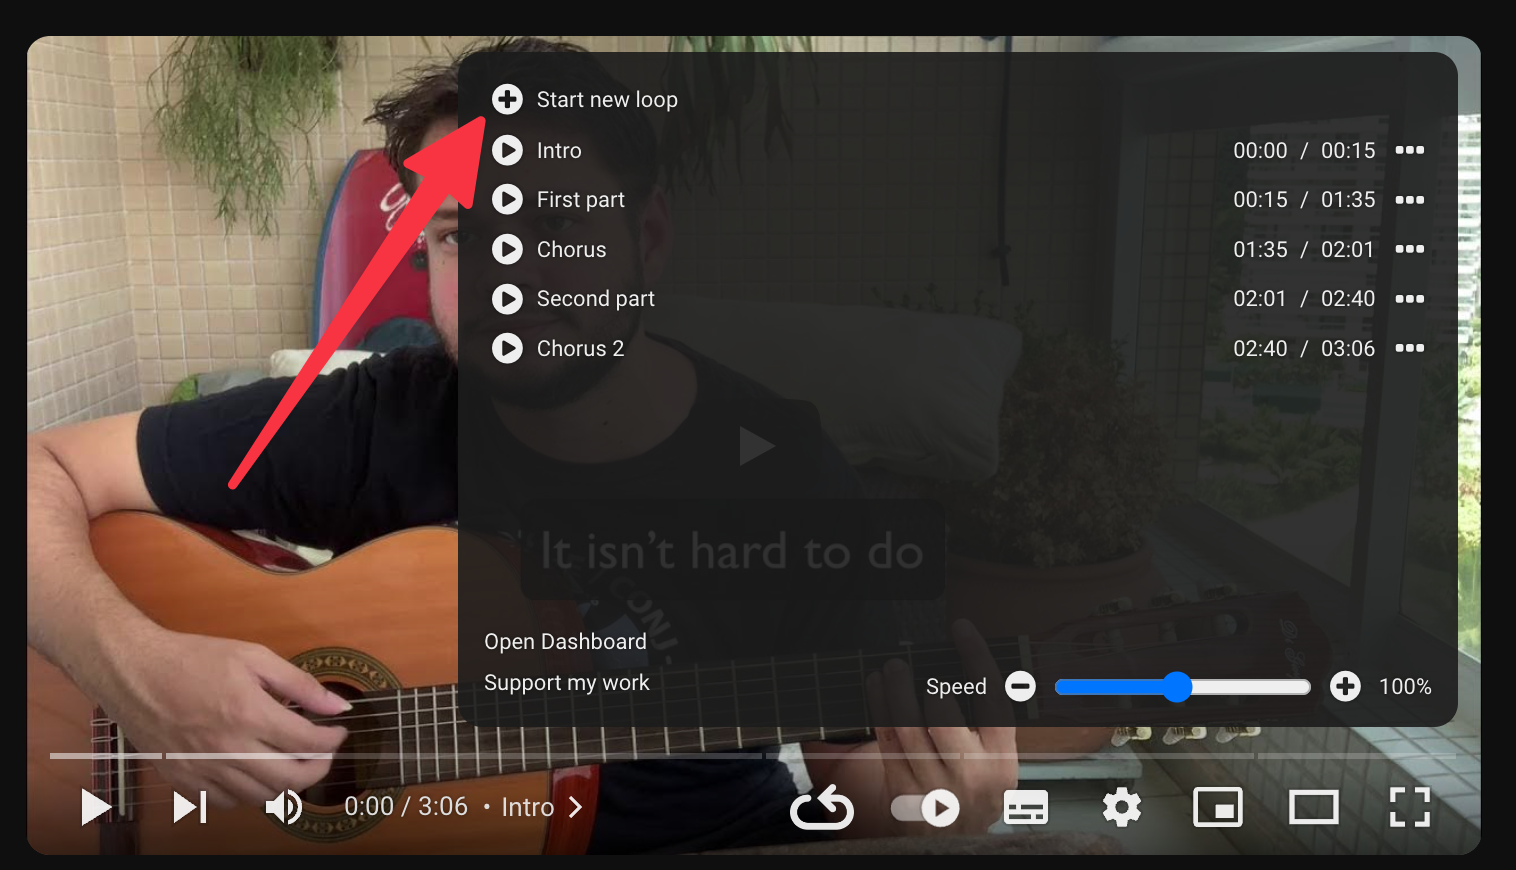
When a video has chapters (like in this example), YouTube Looper will automatically create a loop on each chapter:
When you start a new loop, the current video time will be the start time of a loop. You can start a loop with the video running or paused.
Once you mark the start point of the loop, you will see an indication of the time it started, and the + button gets
replaced with a stop button:
After click to stop, the new loop will be recorded and will be activated.
Naming your loops will really help you later to remember what that section is about. You can click on the loop label to edit it:
The label is automatically saved as you type. Hit return or escape to remove the focus from label input.
You can edit the loop timing after it has been created. For this task you can use the - and + buttons around the
timings. The buttons will adjust the timing by one second on each click. If you hold the shift key, you can do a
precise adjustment, that iterates in 100ms offsets.
You can also click in the time to edit as a text.
When a loop time is contained inside the range of another loop, this loop will be displayed as a child of the parent loop. This is common when you want, for example, to break a section to train in smaller sections and later go wider. If there are many levels of nesting, the loops will indent accordingly.
On the right side of each loop you can see a ..., mouse over it to reveal the actions for that loop.
Use the duplicate action to create a copy from the loop.
Click on this action to delete the loop. Loops created from markers can't be deleted.
Split loop will create two loops by splitting the selected loop at the current video time. The split action only shows when the current time of the video is inside the boundaries of the loop you are seeing the actions for.
The speed control at the lower right of the panel allows you to have precise control over the video playback speed.
Click on the label Speed to return it to 100%.
alt+z- Start loop recordingalt+z- End loop recording (after started)alt+z- Seek to begin of loop (when loop is active)alt+shift+z- Seek to begin of loop minus 3 seconds (when loop is active)
You can open the popup window by clicking on the YouTube Looper icon in the Chrome toolbar:
The popup window gives a link to access the dashboard, and also displays the last four videos you have played a loop on.
In the dashboard page you can see all the videos you have recorded loops for. Use the search input to find some video.
Use the export button to save all your loops in a file that you can use to restore later, or to copy to a different installation, or share loops with friends.
Here you can import files created using the export feature. You will see an import preview to see what you are importing.
Currently, the only setting is to configure a sync service. This is an advanced topic and only recommended to people with some programming experience. You have to set up a service, that can run on your machine or somewhere that's accessible in the network.
This version of the YouTube Looper uses TinyBase as the data layer. If you have multiple devices or want to back up your data locally; you can run a server and connect to it!
You're going to need to have some developer tools installed on your machine:
- Bun
- Git
Download and run the server:
git clone https://github.com/wilkerlucio/youtube-looper-server.git
cd youtube-looper-server
bun run index.ts
After that, open the settings in the extension dashboard and paste this in the URL for the WebSocket connection:
ws://localhost:8047/youtube-looper
The background will turn green when the connection is successfully made.
When you have sync turned on, you will notice a circle in the bottom area of the modal:
The green circle means the connection is working and your data is synced. If you see a red dot, go to the dashboard page and check your configuration.
One way to back up the data from the server is to back up the files at server-storage folder.
There will be a JSON file called youtube-looper.json if you followed the configuration described above.
If you like to develop the extension, make sure you have pnpm installed, and them:
pnpm i
pnpm run dev
This will start the compilation and open the browser in an anonymous profile with the extension in dev mode installed on it.
To build releases:
# for chrome
pnpm run zip

# for firefox
pnpm run zip:firefox


