# SiteProxy 2.0
- [简体中文](README.md)
SiteProxy is a **powerful online proxy tool** that leverages the latest technologies to enhance stability and compatibility. We are committed to providing **simple, efficient, and secure** proxy services to deliver the best internet access experience.
- **Super High Performance**: Replaces the traditional Express server with Hono, improving performance by 4 times for a smoother user experience.
- **Cloud Deployment**: Fully supports Cloudflare Worker deployment for quick and efficient service.
- **AI Smart Chat**: Integrates DuckDuckGo AI Chat, offering free GPT-3.5 and Claude 3, making your proxy service smarter.
- **Advanced Security Protection**: Supports password-controlled access, ensuring only authorized users can use the proxy, significantly enhancing security.
- **Zero Configuration Use**: Users need no client configuration; simply access the proxy URL to surf the global internet.
- **Convenient Login**: Fully supports GitHub and Telegram Web login for simple and fast operations.
- **Strong Encryption**: Utilizes `RSA + AES` dual encryption technology to protect user login passwords and prevent man-in-the-middle attacks.
- **Privacy Protection**: Access the global internet via the proxy URL while hiding the user's real IP to protect privacy.
- **Seamless Experience**: No software installation or browser configuration is needed; just use it immediately for an extremely convenient user experience.
<details>
<summary>View Principle</summary>
```
+----> google/youtube
+----------------+ |
| | |
user browser +-------------->+ siteproxy +-------> wikipedia
| | |
+----------------+ |
+----> chinese forums
```
</details>
> [!CAUTION]
> This project must not be used for any illegal purposes. Users are responsible for their actions.
> [!WARNING]
> Due to the support for multiple website logins, to reduce phishing risks, SiteProxy in version 2.0 obfuscates the code and prohibits modifying the default homepage URL.
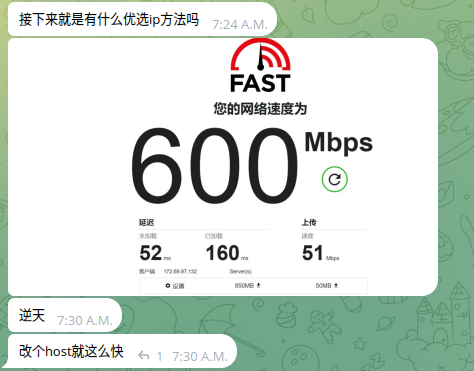
## Demonstration
A demonstration by a Telegram user of SiteProxy deployment and speed test with optimized IPs:
## Deployment to Cloudflare Pages
1. **Ensure Domain Management**:
- Make sure your domain is managed under Cloudflare.
2. **Clone Repository**:
- Execute the command: `git clone https://github.com/netptop/siteproxy.git`
3. **Edit Configuration File**:
- Open the `siteproxy/build/cf_page/_worker.js` file with a text editor.
- Search and replace the string `http://localhost:5006` with your proxy server domain, e.g., `https://your-proxy-domain.com` (ensure to use `https`).
- Search and replace the string `user22334455` with your desired access password. If the password is empty, it means no password is required for access. Save the file.
4. **Log in to Cloudflare**:
- Go to the **Workers and Pages** section, choose **Create a Page by Direct Upload**, and upload the `siteproxy/build/cf_page` directory for deployment.
5. **Configure Custom Domain**:
- On the **Workers & Pages** page, open the just-deployed Page.
- Click on **Custom Domains** at the top, then choose **Add Custom Domain**, set it to your proxy domain, and activate the domain.
6. **Access Proxy Service**:
- Now you can access the proxy service via `https://your-proxy-domain.com/your-password/` (ensure the trailing slash exists). Remember to replace the domain and password with your own.
## Deployment to Cloudflare Workers
1. **Ensure Domain Management**:
- Make sure your domain is managed under Cloudflare.
2. **Download and Edit Worker File**:
- Download the `build/worker.js` file: [link](https://raw.githubusercontent.com/netptop/siteproxy/master/build/worker.js), and open it with a text editor.
- Search and replace the string `http://localhost:5006` with your proxy server domain, e.g., `https://your-worker-domain.com` (ensure to use `https`).
- Search and replace the string `user22334455` with your desired access password. If the password is empty, it means no password is required for access.
3. **Create Worker**:
- Log in to Cloudflare, go to the **Workers and Pages** section, and create a Worker.
- Edit the newly created Worker, copy and paste the edited `worker.js` file content into the Worker, save and deploy it.
4. **Configure Custom Domain**:
- On the **Workers & Pages** page, open the just-saved Worker.
- Click on **Settings -> Triggers** at the top, then choose **Add Custom Domain**, and set it to your proxy domain. The DNS page should show the corresponding DNS type as Worker after setting the custom domain.
5. **Access Proxy Service**:
- Now you can access the proxy service via `https://your-worker-domain.com/your-password/` (ensure the trailing slash exists, and replace with your own domain and password).
## Deployment to VPS or Cloud Server
1. **Create SSL Website**:
- Use `certbot` and `nginx` to create an SSL website. You can Google for specific usage.
- Configure `nginx`, ensuring the `/etc/nginx/conf.d/default.conf` file contains the following:
```nginx
server {
server_name your-proxy.domain.name;
location / {
proxy_pass http://localhost:5006;
}
}
```
2. **Restart nginx**:
- Execute the command: `sudo systemctl restart nginx`
3. **Install Node.js v21 or Higher**:
- Execute the following commands:
```bash
curl -o- https://raw.githubusercontent.com/nvm-sh/nvm/v0.39.7/install.sh | bash
source ~/.bashrc
nvm install v21
```
4. **Clone Repository**:
- Execute the command: `git clone https://github.com/netptop/siteproxy.git`
5. **Enter Project Directory**:
- Execute the command: `cd siteproxy`
6. **Test Run**:
- Execute the command: `node bundle.js`
- If there are no errors, press `Ctrl+C` to end the program.
7. **Modify Configuration File**:
- Open and modify the `config.json` file, as follows:
```json
{
"proxy_url": "https://your-proxy.domain.name", // Replace with your proxy server domain, ensure to use https
"token_prefix": "/user-SetYourPasswordHere/", // Set the website password to prevent unauthorized access, keep the slashes. Empty means no password.
"local_listen_port": 5006, // Do not modify to ensure consistency with nginx configuration
"description": "Note: token_prefix is equivalent to a website password, please set it carefully. The combination of proxy_url and token_prefix is the access URL."
}
```
8. **Install Forever**:
- Execute the command: `npm install -g forever`
9. **Start Application**:
- Execute the command: `forever stopall && forever start bundle.js`
10. **Access Proxy Service**:
- Access your domain in the browser with the URL being the combination of `proxy_url` and `token_prefix`.
11. **Use Cloudflare Acceleration (Optional)**:
- Refer to Cloudflare's official instructions for setup.
Now, your proxy service has been successfully deployed and can be accessed through the browser.
## Docker Deployment
1. **Configure SSL Certificate and Nginx**:
- Configure the SSL certificate and Nginx for the domain, directing it to the local port 5006.
2. **Clone Repository**:
- Execute the command: `git clone https://github.com/netptop/siteproxy.git`
3. **Edit Configuration File**:
- Open and modify the `config.json` file as follows:
```json
{
"proxy_url": "https://your-proxy-domain.com", // Replace with your obtained proxy server domain
"token_prefix": "/user-SetYourPasswordHere/", // Set the website password to prevent unauthorized access, keep the slashes
"description": "Note: token_prefix is equivalent to a website password, please set it carefully. The combination of proxy_url and token_prefix is the access URL."
}
```
- Save the file.
4. **Start Docker Container**:
- Enter the `docker-node` subdirectory.
- Execute the command: `sudo docker compose up`
5. **Access Proxy Service**:
- Now you can access the proxy service via `https://your-proxy-domain.com/user-your-password/`. Please replace the domain and password with your own.
## Acknowledgements
- The default homepage of netptop.com was designed by Telegram user SenZyo. Thank you for the contribution!
- Documentation was written by [LAGSNES](https://github.com/SNESNya).
## Contact
Telegram group: https://siteproxy.t.me
E-mail: [netptop@gmail.com](mailto:netptop@gmail.com)