Skip to content
Tech

macOS 10.12 Sierra: The Ars Technica review

Apple's desktop operating system once again plays second fiddle to iOS.

Asking Siri the important questions. Credit: Andrew Cunningham

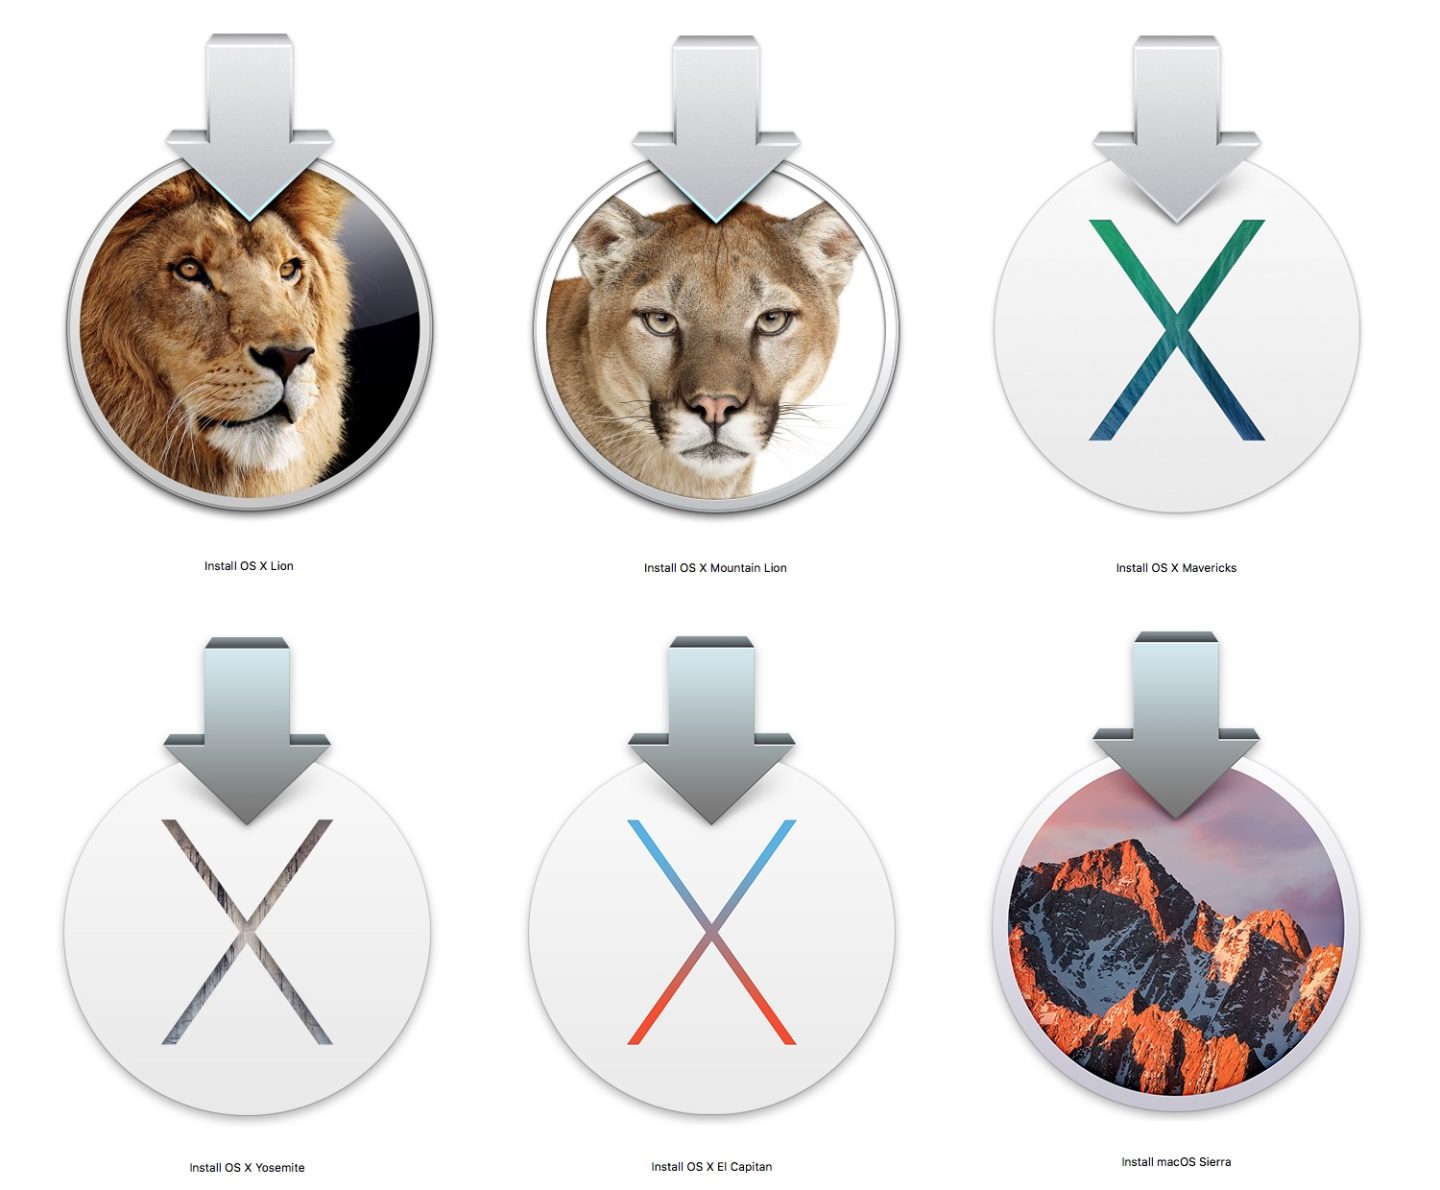
When Mac OS X (as it was then called) first moved to a yearly release cycle in 2011, Apple had trouble defining its scope for each release. Lion, the first in this cadence and the first release to pull in a significant number of features from iOS, feels like a half-finished version of Mountain Lion in retrospect. Mavericks stripped out some of previous versions' skeuomorphism and superfluous texture, but the Mac didn’t fully match with iOS 7 until Yosemite came out a year later.

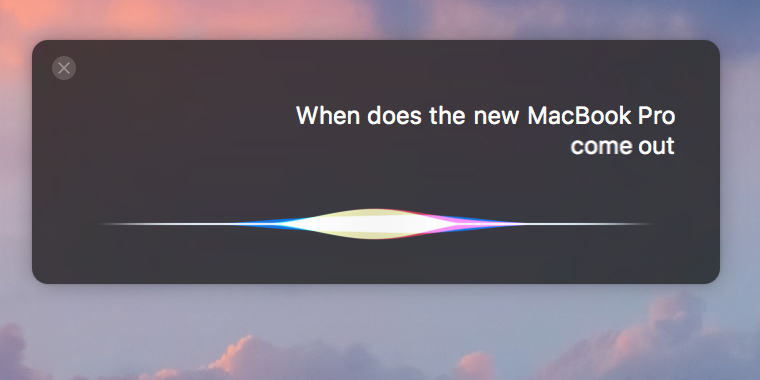
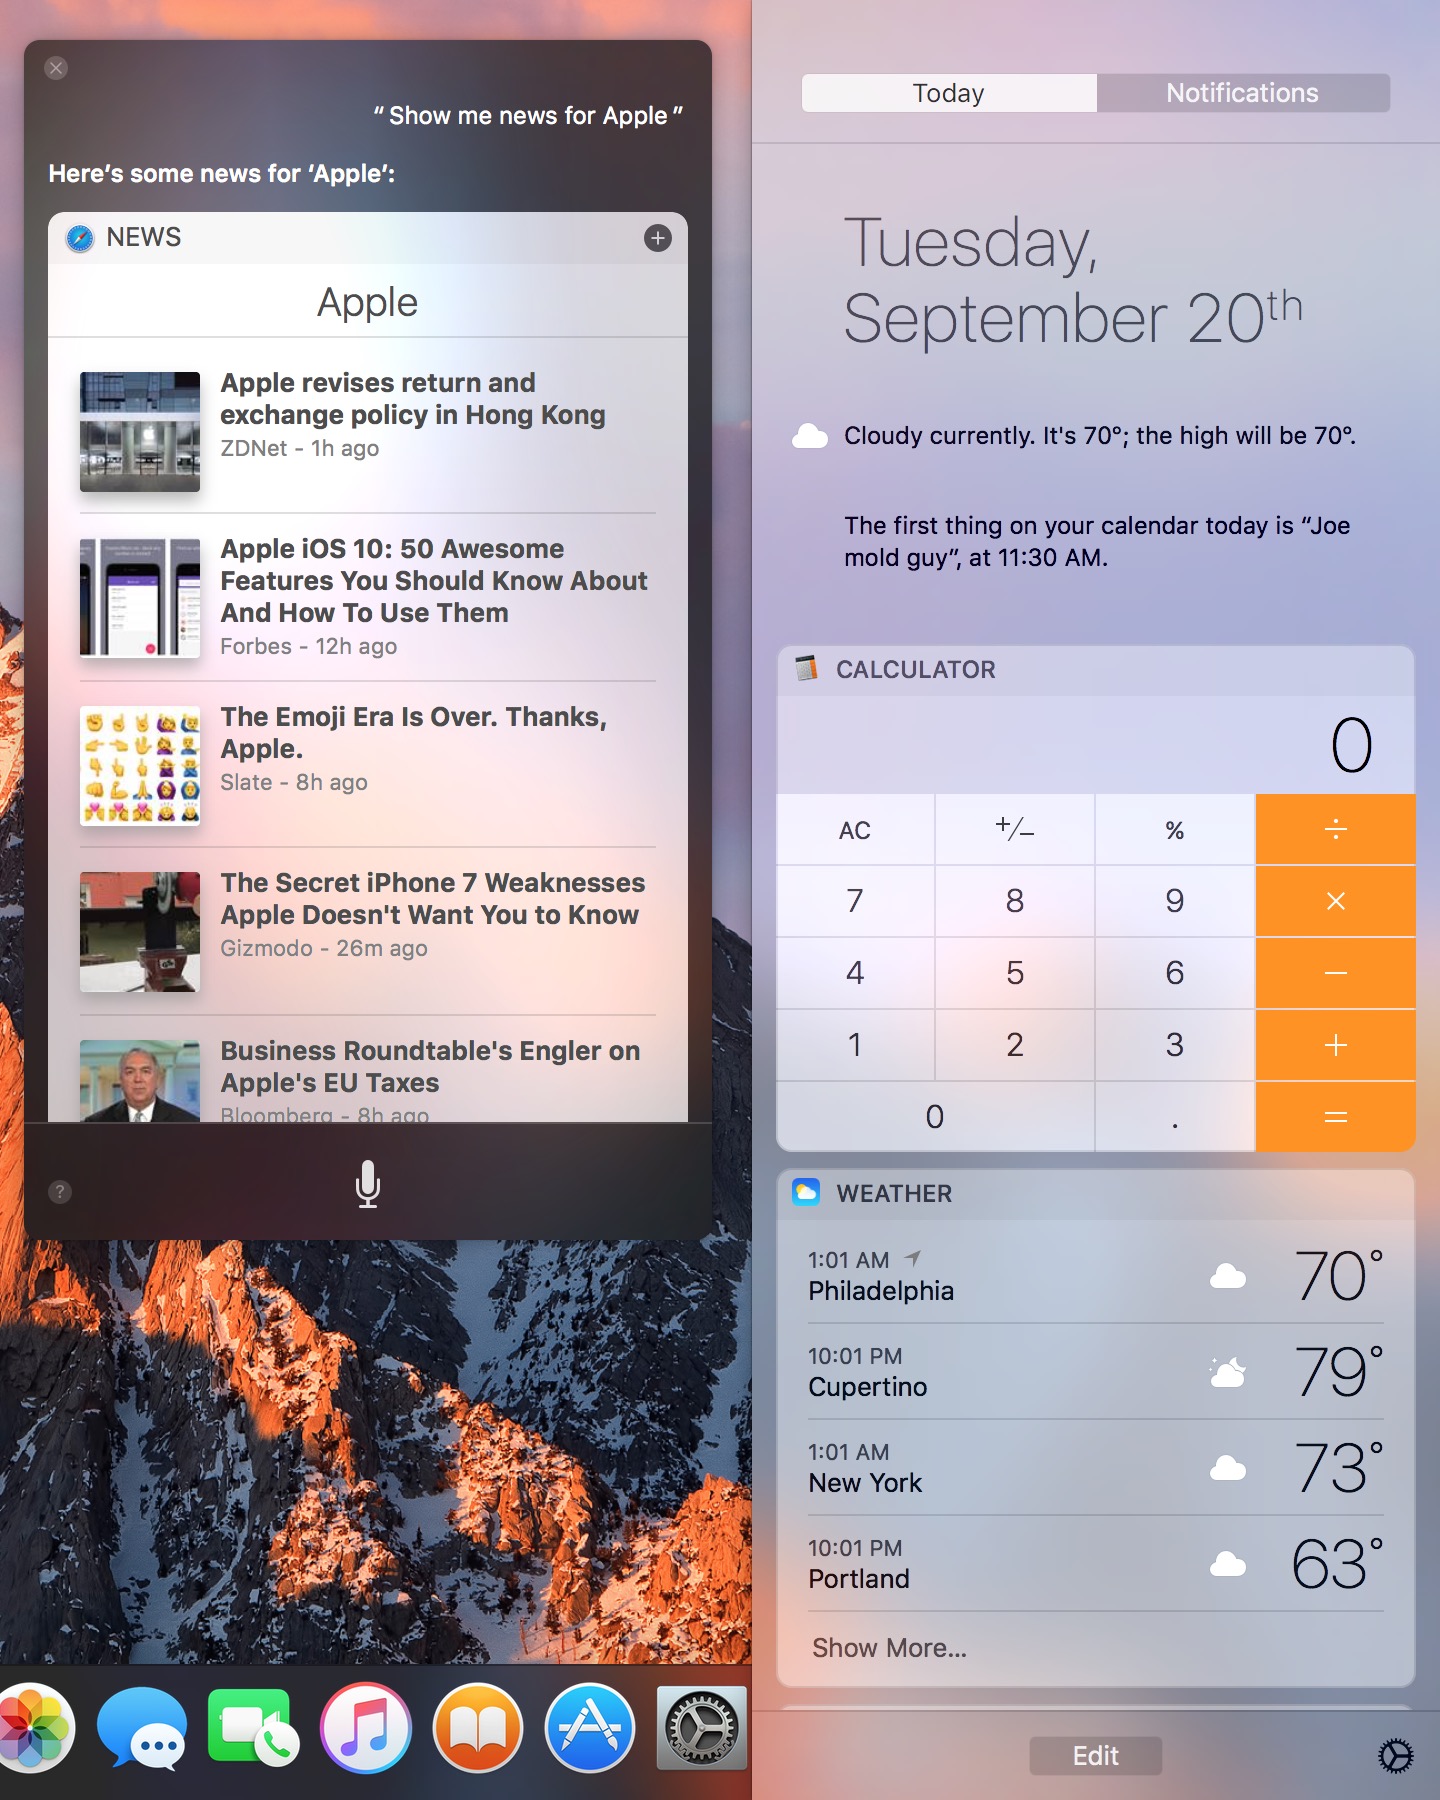
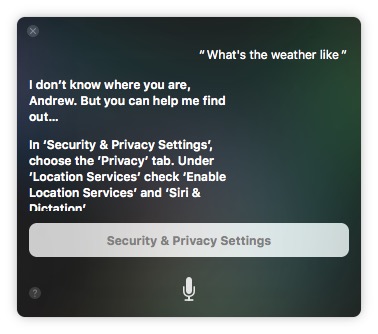
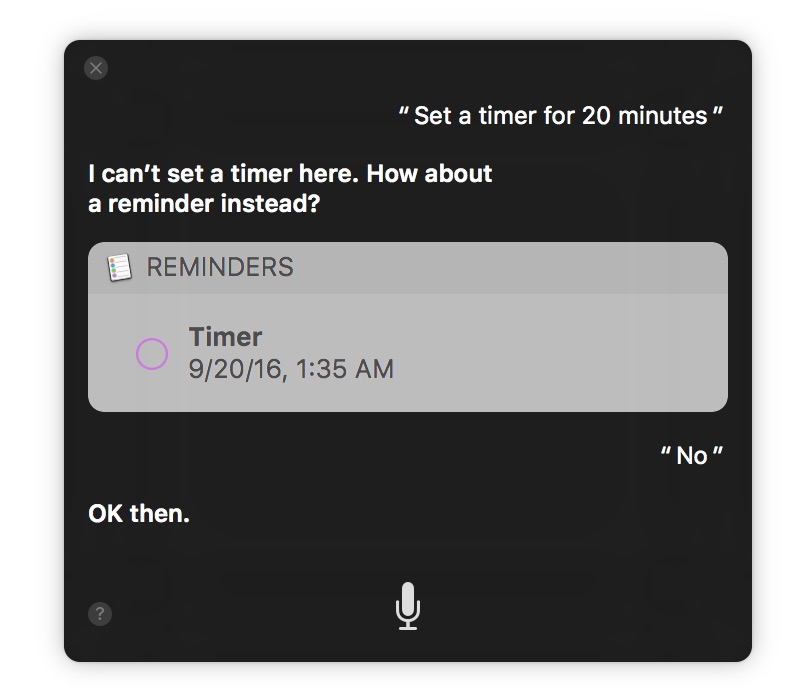
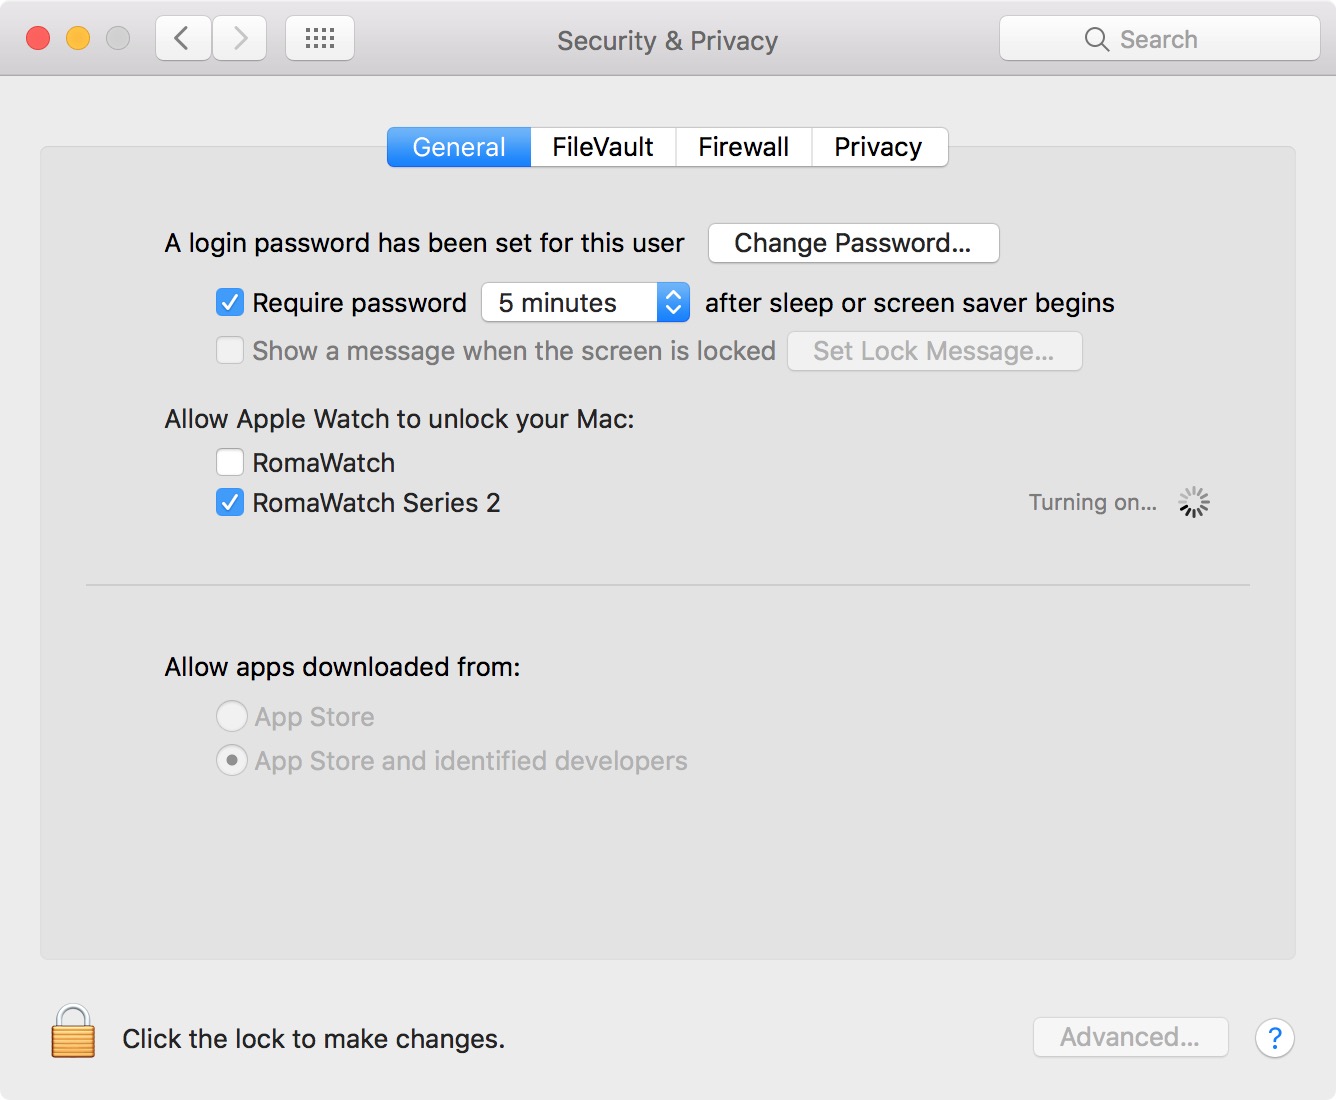
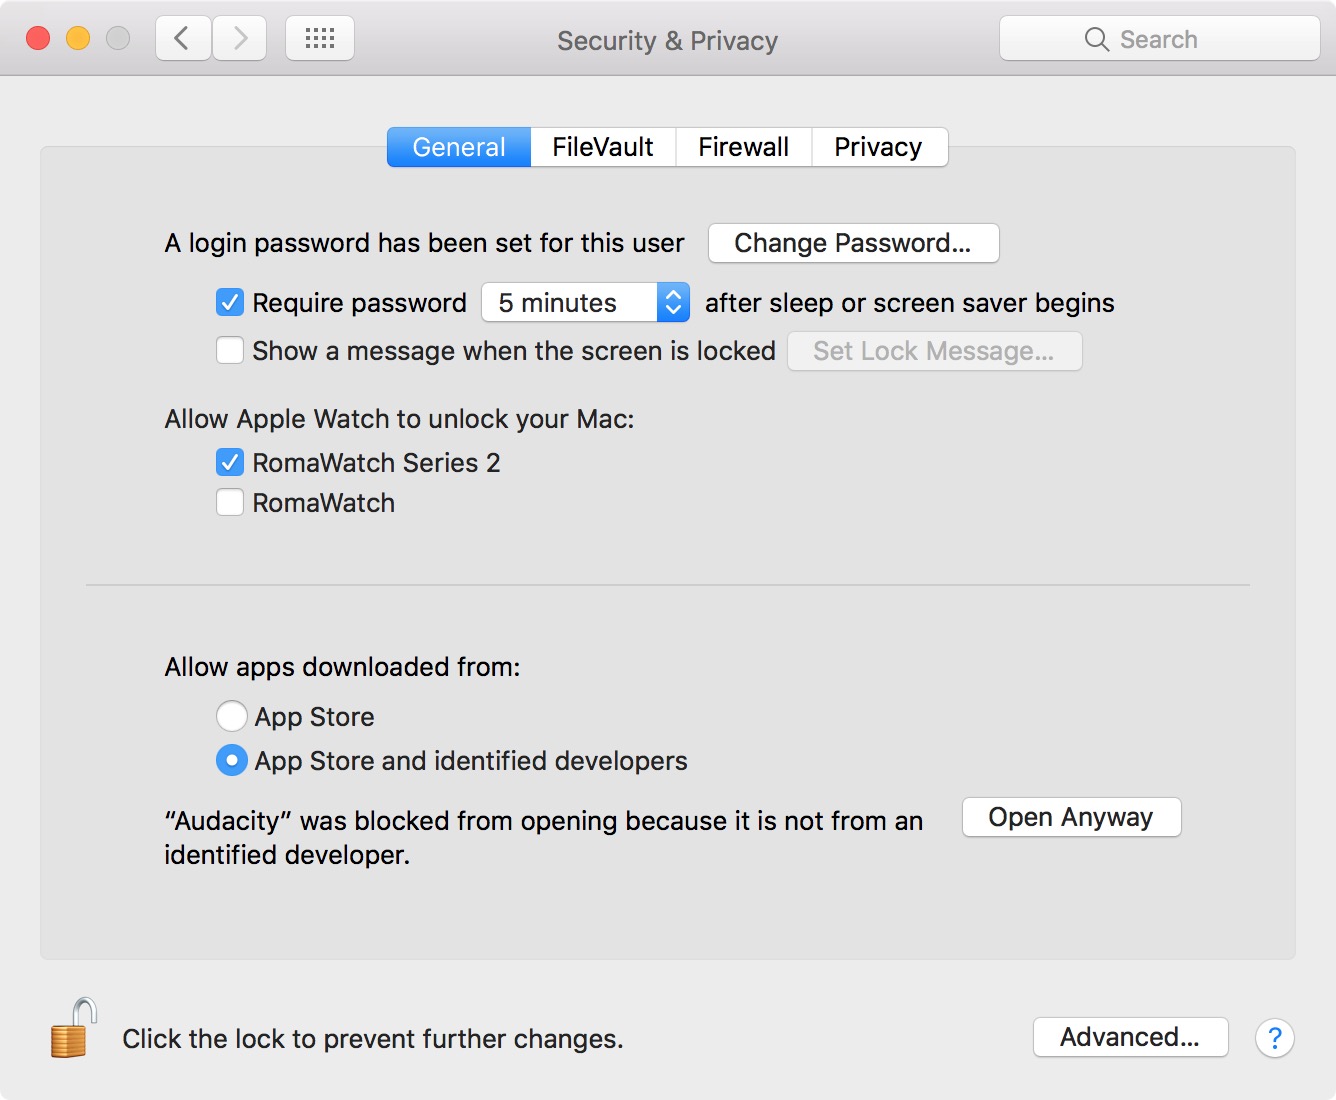
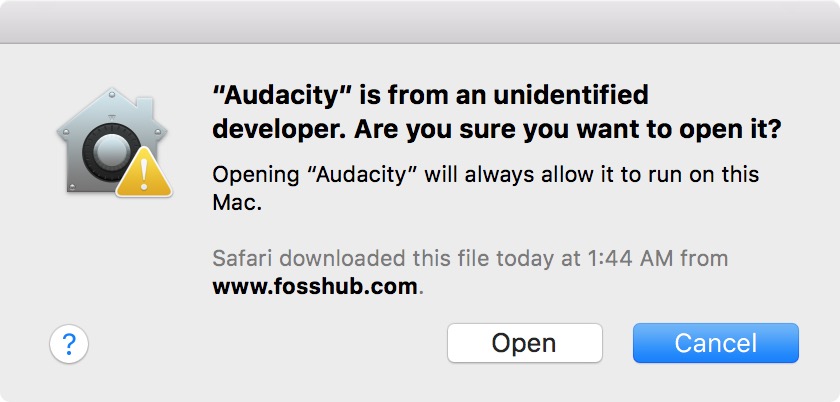
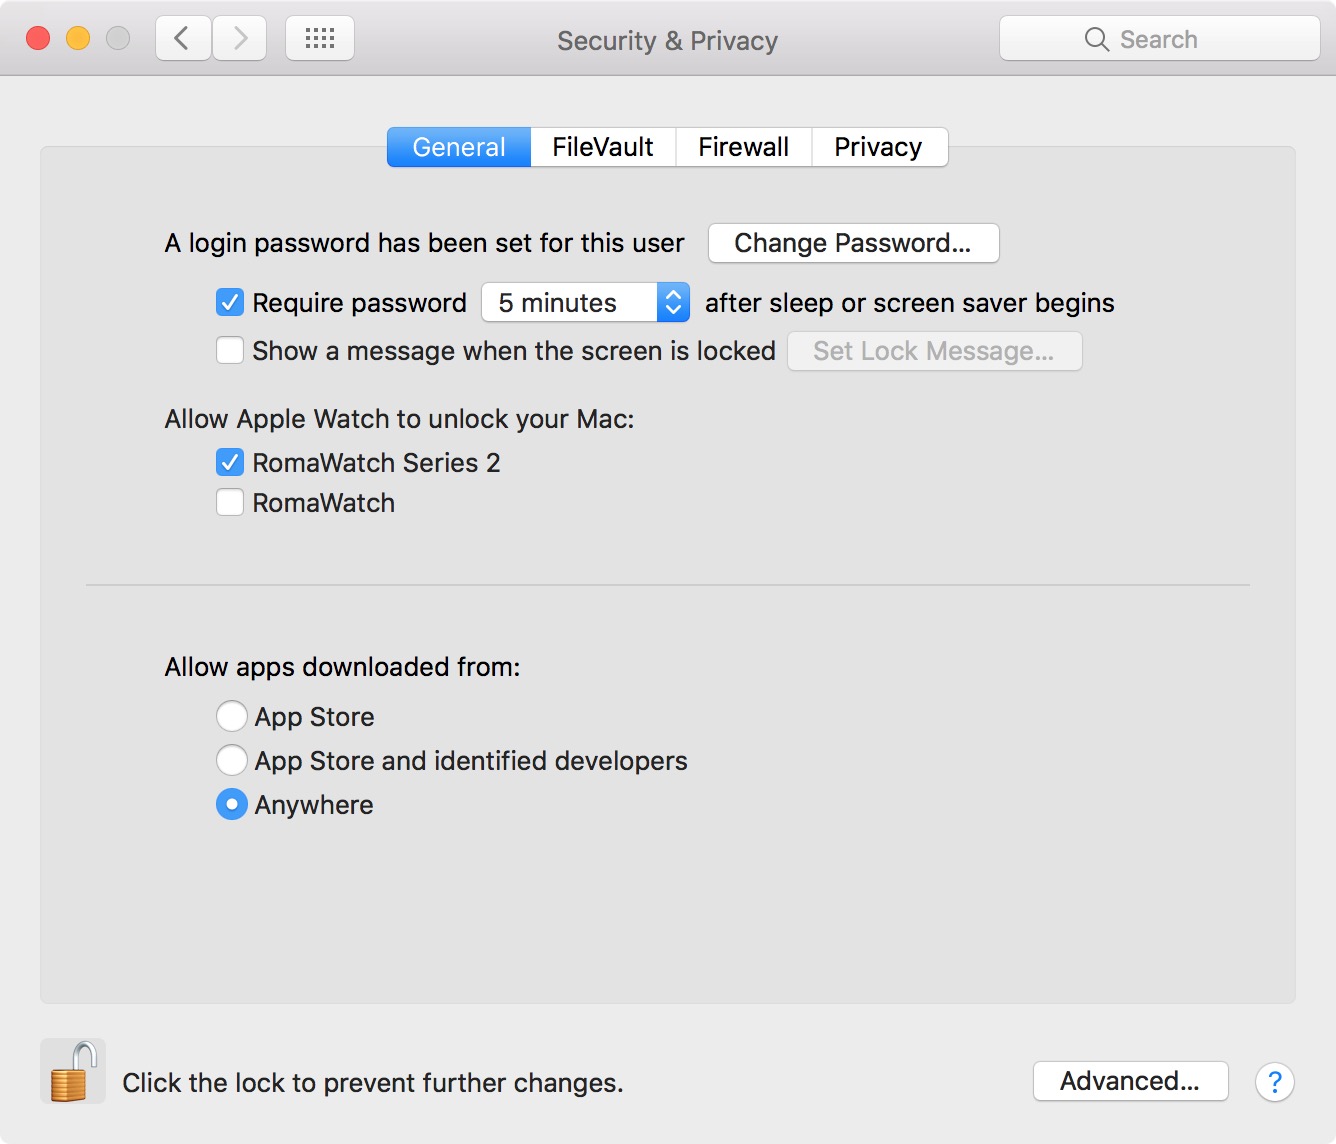
Since Yosemite, things have felt more tightly controlled, more planned. El Capitan and Sierra both designate one or two big "hero" features for Apple to plan its marketing around (window management in El Capitan, Siri in Sierra), a decent range of medium-sized changes, at least one big under-the-hood addition (System Integrity Protection in 10.11, the Gatekeeper stuff in 10.12, and APFS next year if all goes well), and a smattering of minor improvements to the core apps.

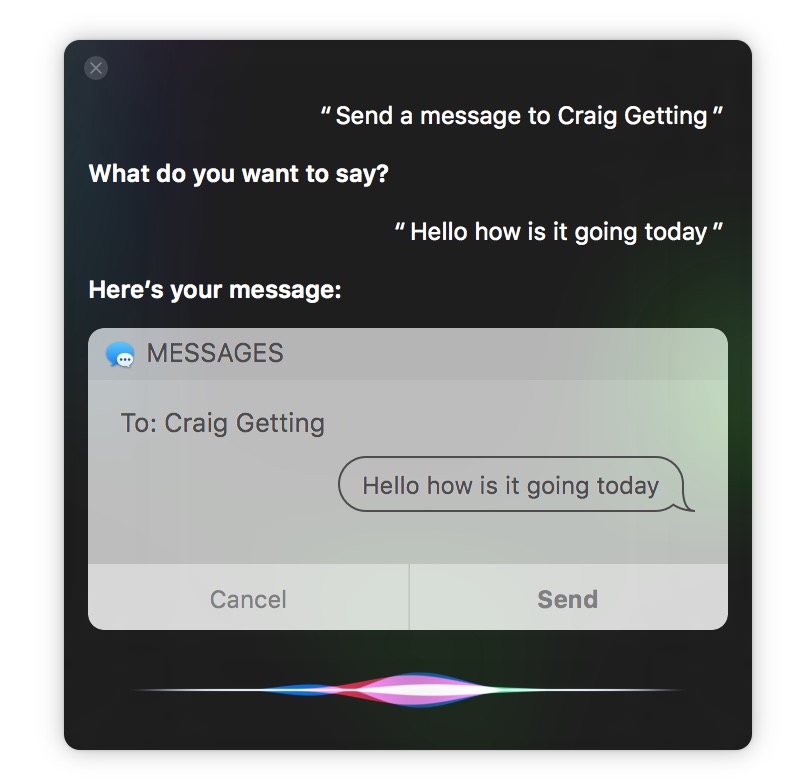
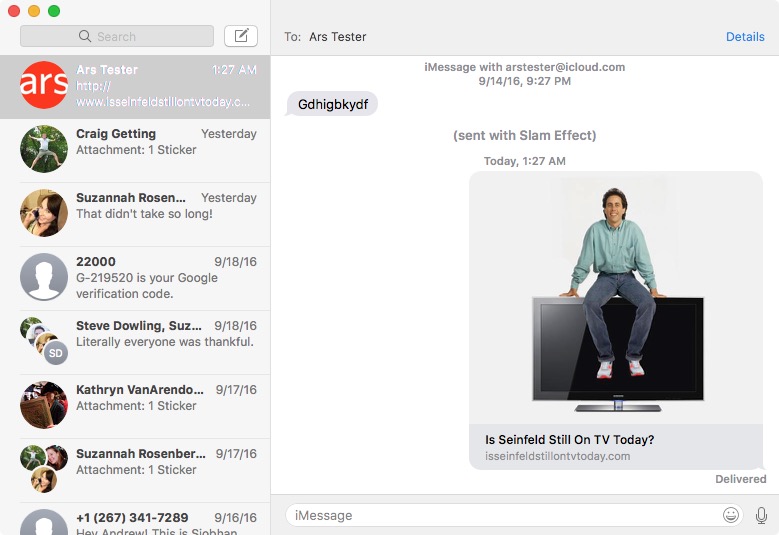
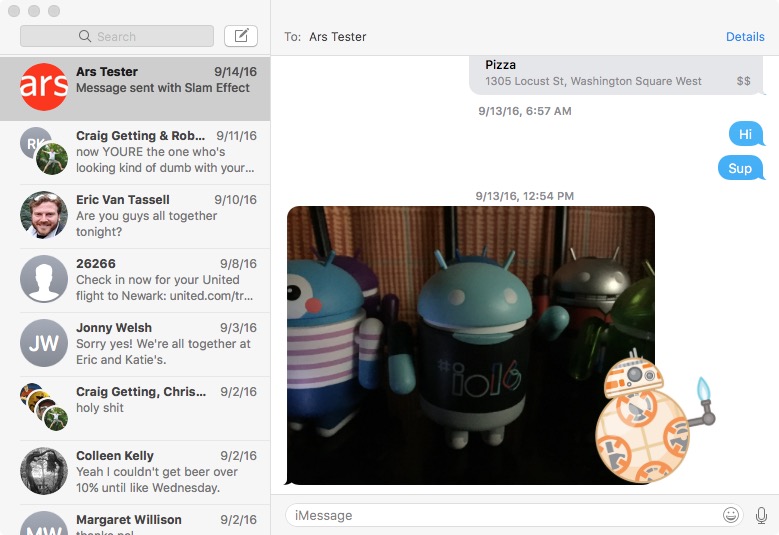
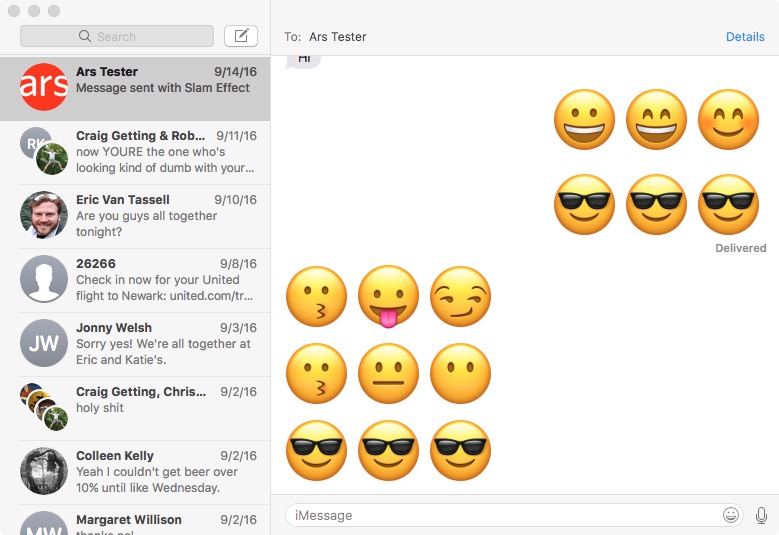
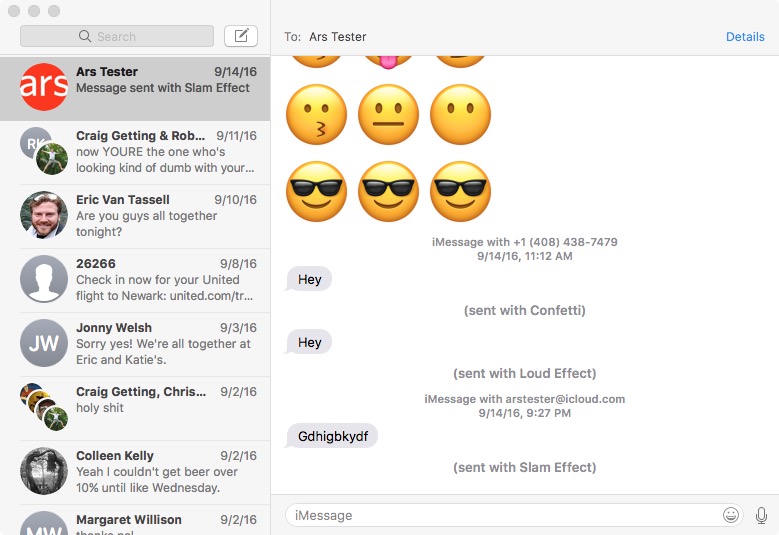
It has been a long time since the Mac was Apple's favorite child, and there are places in Sierra (like the Messages app) where it clearly feels like Mac users are getting a second-tier experience compared to people on iOS. Add in the Mac’s stale, aging hardware lineup and Apple’s total lack of communication about it, and there seem to be real problems for the Mac as a platform.

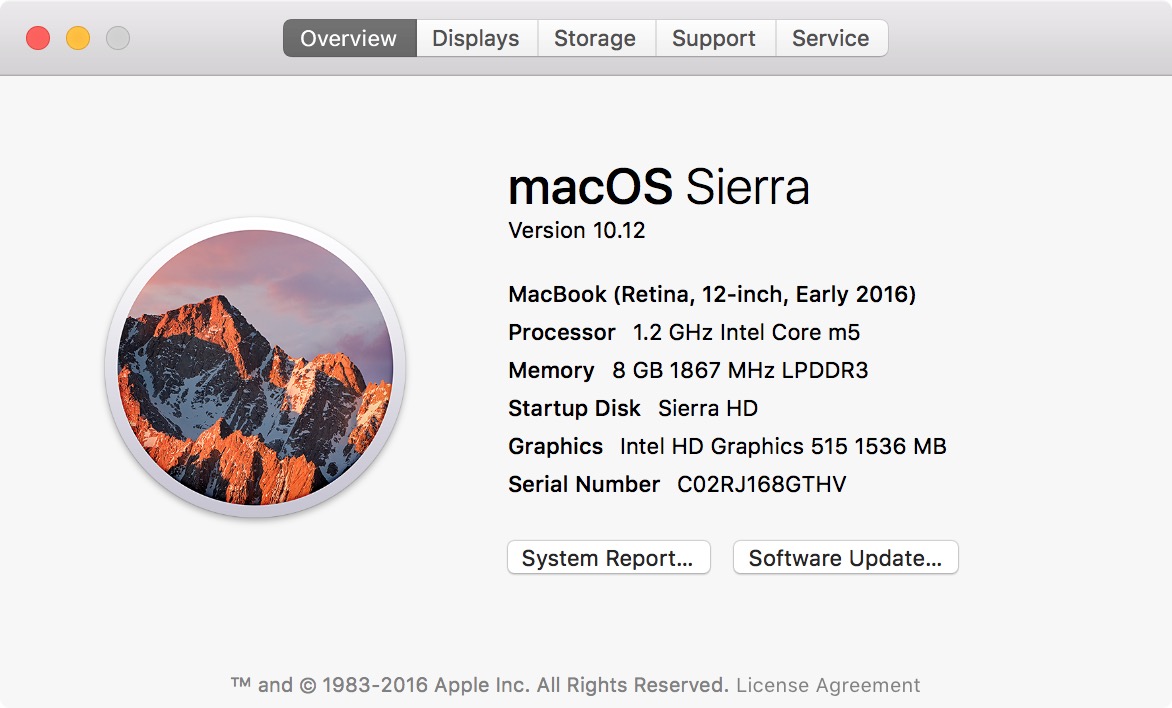
But for all the Mac users already out there, Sierra happily trundles along in the operating system’s quiet and reliable groove. The name has changed, but otherwise it's business as usual for Mac OS Mac OS X OS X macOS.

Table of Contents

System requirements and compatibility

Sierra is the first version of macOS to drop support for any Macs since Mountain Lion in 2012. To recap, here's the support list:

Ars Video


  • MacBook (late 2009 and later)
  • iMac (late 2009 and later)
  • MacBook Air (2010 and later)
  • MacBook Pro (2010 and later)
  • Mac Mini (2010 and later)
  • Mac Pro (2010 and later)

This cuts out a fairly wide swath of consumer Macs from 2007, 2008, and 2009, as well as any old Xserves that are still kicking around out there (if you’re still using one of those, you should get in touch because I’d love to know why). If you want to use any Continuity or Continuity-adjacent features—Handoff, the modern version of AirDrop, universal clipboard, Apple Pay on the Web, and more—the hardware requirements get more specific. Basically you need something with Bluetooth 4.0 support, a list that includes:

  • MacBook (Early 2015 and later)
  • iMac (Late 2012 and later)
  • MacBook Air (Mid 2012 and later)
  • MacBook Pro (Mid 2012 and later)
  • Mac Mini (Late 2012 and later)
  • Mac Pro (Late 2013)

And finally, Apple Watch unlocking also requires 802.11ac Wi-Fi because of the way the software determines the distance between your watch and your Mac. That list includes:

  • MacBook (Early 2015 and later)
  • iMac (Late 2013 and later)
  • MacBook Air (Mid 2013 and later)
  • MacBook Pro (Late 2013 and later)
  • Mac Mini (Late 2014)
  • Mac Pro (Late 2013)

When Snow Leopard, Lion, and Mountain Lion dropped older Macs, there were clear reasons why the hardware that went unsupported was being left behind (PowerPC CPUs, 32-bit Intel CPUs, and 32-bit EFI and driver limitations, respectively). In Sierra, aging hardware and drivers are a factor—drivers especially, since a lot of the GPUs, networking hardware, and chipsets in those older machines have long since been forgotten by the hardware companies that made them—but there are no hard-and-fast hardware cutoffs. I’ve seen many attempts to define a strictly hardware-related cutoff, but none of them quite work.

  • It’s not related to GPU drivers, since systems on both sides of the line include older Nvidia GPUs like the GeForce 9400M and 9600M.
  • It’s not related to AES encryption acceleration, since there are Core 2 Duo and Core i3 CPUs in supported Macs that don’t support Intel’s AES-NI acceleration.
  • It's not about late-model 45nm Core 2 Duo processors based on the “Penryn” and “Wolfdale” architectures. Those processors do appear to be required, since reports say that attempting to hack an installation onto an older system with a 65nm “Merom” Core 2 Duo results in failure. But there are many 2008- and 2009-era Penryn- and Wolfdale-based systems that aren't officially supported.
  • It’s not related to any particular Wi-Fi chip. Again, some older systems have incompatible Wi-Fi adapters, but others do not.

Efforts to install Sierra on many Macs that are just a tiny bit too old for the update, including many from 2008 and 2009, actually yield no major hardware compatibility problems whatsoever. So the answer, in the end, is that Apple is no longer supporting some of these systems because Apple no longer wants to.

And that’s Apple’s prerogative. The company doesn’t want to keep old stuff around forever, and those older systems are much slower and have much worse battery life than modern machines. But it is the first time since roughly 2007 that Macs have been dropped for reasons that weren’t completely technical, and even when Leopard dropped early G4s, it was easier to make the argument that those old systems were too slow to run it particularly well. These days it's pretty easy to drop a couple hundred dollars on some RAM and an SSD to make an aging Mac run like new again.

Apple has told us that the compatibility lines have been drawn where they've been drawn in an effort to drop some of the legacy cruft while keeping the support list relatively simple and easy to parse. Apple also told us that the changes are intended to bring the company's software support lifecycle more in line with its hardware support lifecycle. Apple will typically offer to repair and replace Macs bought between five and seven years ago. At that point, the hardware becomes "vintage," and Apple will no longer service it (with exceptions made in accordance with local laws). Products discontinued more than seven years ago are declared "obsolete," at which point repairs will not be made and parts cannot be ordered.

All of the 2007, 2008, and 2009-era Macs that Apple has dropped here are either "obsolete" or skirting that line between "vintage" and "obsolete," and since relatively few of them are still in active service Apple is taking them off the list. What remains to be seen is whether this new baseline will stick around for a few years or if Apple will continue to drop older Macs steadily as they fall back to "vintage" and "obsolete" status.

The cutoff will inevitably lead to accusations that Apple is dropping support for some Macs for no good reason, but people who want to keep other Macs going won't be completely out in the cold, at least not yet. Apple typically supports older OS versions for two-or-so years after they're replaced with new ones, providing them with applicable security updates as well as new versions of Safari and iTunes. And finally, Apple told us it would continue to offer an upgrade path to older Macs that stop at El Capitan but haven't yet been upgraded for whatever reason. While the installer will disappear from the public Mac App Store, anyone without the El Capitan installer already in their purchase history will be able to add it via an Apple support page.

The ability to get free software updates for Macs that are as much as six or seven years old is still pretty good, all things considered, and Macs stuck on El Capitan should be eligible for two-or-so years of security updates and a long tail of third-party developer support. Plenty of common Mac productivity and media apps still target Mavericks (2013) or even Snow Leopard (2009) as their minimum requirement; Microsoft Office for Mac only requires Yosemite (2014). Your Mac will stay productive and secure for a few years yet; it just won’t get Apple’s newest feature updates when they’re released (the biggest compatibility problem might be with some of Apple’s iCloud services, which sometimes change in ways that break compatibility with older operating systems, but that’s hard to predict).

If you're desperate to keep Sierra running on older, officially unsupported hardware, there are tools to help you get around it, but I would hesitate to do this unless you were absolutely fine with losing all data on the machine pretty regularly. Even if you get it working using some of the available guides, you’re beginning to get into Hackintosh territory, and those systems can be broken by simple OS updates. If you don't feel like doing that, there's always Windows or Linux, though Apple's Boot Camp drivers for these older Macs are all from the Windows 7 era at this point and may not work perfectly under Windows 10.

Branding and installation

Goodbye OS X, hello macOS.
As far as the OS itself is concerned, everything gets retconned.
Dark-on-light Notification Center/Today View next to light-on-dark Siri.
Notifications get the new bubble styling from iOS 10.

Though the version number is in fact listed as 10.12, Sierra is the first release of the Mac operating system since the turn of the millennium or so to totally forsake the "Mac OS X" or "OS X" branding. "macOS," as it's now called, fits better with the names of the three other operating systems that Apple is maintaining. The switch is mostly symbolic. It changes basically nothing about the way that the Mac as a platform looks and works, but hey at least it will free us all from having to explain that well actually it's pronounced "oh ess ten" and not "oh ess ecks."

References to “OS X,” which were still all over the place in the first beta, steadily disappeared over the public phase of Sierra’s development, and now it’s macOS pretty much anywhere you look, including in the System Preferences and the installer. To distinguish Sierra from other, older releases in this review, we may still collectively refer to pre-Sierra releases as "OS X," but as far as Apple itself is concerned the branding is being totally retconned. Put down a Mavericks partition on a Mac with Sierra, and Startup Disk will tell you that you've installed "macOS 10.9.5."

This is our sixth download-only macOS release, and our sixth since we’ve actually had any physical packaging to look toward for design statements. But hey, how about those installer icons?

Six years of downloadable installers.
Six years of downloadable installers. Credit: Andrew Cunningham

Lion and Mountain Lion both used pictures of their titular big cats for their installers, but when Apple switched to more abstract codenames like “a beach” or “some big rocks," the installers became plain-old Xes that just got skinnier and changed color every year. But macOS drops the X from the public branding (if not the version number, which is still 10.12), and so the installer likewise drops the X and goes back to a representative picture.

Sierra’s installer is significantly smaller than El Capitan’s—the second Golden Master build of Sierra is 4.78GB, compared to 6.22GB for the current 10.11.6 El Capitan installer. That makes it the smallest macOS installer since Mountain Lion (4.47GB for 10.8.5), which only matters when you’re downloading it to install it but is pretty neat regardless.

In our testing, Sierra also needs a smaller amount of disk space than El Capitan, but it's not a huge difference. A fresh Sierra installation with one local user account signed in needed about 11.7GB of space on a 2016 MacBook, while El Capitan needed 11.9GB of space on the same hardware. Your experience may vary depending on the hardware you're using.

It's mostly the same as before, just with some updated art.

The setup process itself is exactly the same as it was in El Capitan, just tweaked to introduce Siri and the iCloud Desktop and Documents features. Apple has also tweaked some of the art (keyboards and so on) to match its current accessories. Disk encryption is still offered and recommended if you sign in via an iCloud account and want to store your key with Apple, but it’s not an invisible default the way it is in iOS. Some older systems will take a pretty big hit from enabling encryption, so this is probably Apple’s way to meet those devices in the middle.

Finder and UI

The Finder looks mostly the same, except that stuff stored in iCloud that hasn't been downloaded to your Mac has a little cloud icon next to it.
A handful of new options are the biggest non-iCloud Drive-related change to the Finder.

Sierra doesn’t change much about the general look and feel of El Capitan, which in turn was mostly identical to Yosemite, aside from the system typeface and some of the Mission Control and window management changes. Basic OS building blocks like dialog boxes and progress bars and radio bubbles are all pretty much the same. In the pre-Yosemite era, Apple was constantly fiddling with all of its bars and buttons from release to release, but the company seems comfortable with most of the decisions it made when it gave the Mac its comprehensive makeover two years ago.

So if anyone out there is still railing against the frosted-glass-translucency of modern-day macOS, Apple isn’t backtracking on any of its decisions. The option to reduce motion and transparency continues to be available in the Accessibility preference pane, but Apple’s use of translucency is restrained enough that I’ve never had problems reading anything I wanted to read. If you haven’t made the leap yet, it’s time, especially since Mavericks is going to stop getting security updates when Sierra is released to the public.

The only big change to the look and feel of Sierra is the Today View/Notification center, which is now always dark text on a light background even when the dark theme is enabled. The shape of widgets and notifications has been tweaked to keep them in line with the new styling used in iOS 10—every notification and widget is framed in its own discrete bubble. There's no option to clear all notifications as there is on iDevices with 3D Touch, but the button to dismiss an entire day's notifications is now always visible and thus easier to notice and hit.

The Finder looks and works the same way it did in El Capitan with just a few small tweaks, all hidden away in the Advanced tab of the Finder Preferences and mostly related to new features in Sierra. One, checked by default, generates a warning message any time you move a file out of iCloud Drive. Since iCloud Drive is no longer just a safely cordoned-off Dropbox-style folder now, it makes sense—if people enable iCloud uploading of their Desktops and Documents folders and then start moving files to and from USB drives and other folders on the disk, it won’t always be obvious when they’re taking stuff out of iCloud.

Another setting, disabled by default, will empty the Trash every 30 days, one of several things Sierra tries to do to manage disk space. The last setting of note, also disabled by default, will separate files and folders when you choose to sort files by name, listing folders first and then files. This is how Windows has handled this for years. As a longtime Windows user who eventually switched to the Mac, I’ve always found the Mac way of mixing files and folders irritating. Now, it doesn’t need to be that way if you don’t want it to.

Siri

Siri can handle many of the common queries it can handle on iDevices.
Simple Bing-powered news search.

Every macOS release needs a big feature to hang its hat on. Yosemite had the redesign, El Capitan had big window management tweaks, and Sierra has Siri. It’s not immediately clear why Siri took so long to come to the Mac, given that it has been a staple on the iPhone for five years and is one of the primary input methods on both the Apple Watch and the Apple TV, but better late than never.

Apple says that any Mac that will run Sierra is also capable of running Siri, though Mac Minis and Pros without integrated microphones will need to have an external one attached. Newer Macs with a dual noise-canceling mic setup (these started showing up in late 2012 and into the 2013 models) are going to do better with Siri, but you won’t need one to make it work. Microphone input can be set in System Preferences to be independent of the system mic, which can be useful if you want to use your Mac's integrated mic for Siri but an external mic, preamp, or mixer for other kinds of recording.

Siri in macOS works a lot like Siri on iOS or WatchOS or tvOS, but it’s not accurate to say these all work the same way. Siri has been deeply embedded into iOS over the years, and the watch and Apple TV platforms were both designed around using Siri as a primary input method. This is not going to be the case for the Mac, since a lot of the hardware that can run Sierra came out before Siri was even introduced.

As a result, the macOS implementation of Siri feels tacked-on, despite answering many queries just as it does in iOS. By default, Siri exists as an icon in the Dock and in the menu bar, and you click the button to bring it up before speaking to it. In the final build of the software, there’s also a default keyboard shortcut—hold down both Command and the spacebar (the same combination still brings up Spotlight when you don’t hold the keys down).

There’s no option to enable any kind of “Hey Siri” voice activation. Apple says this is because most Mac users’ workflow will make a mouse click or keyboard shortcut a more natural way to bring Siri up, which makes sense. I wouldn’t be surprised if there were also concerns about retrofitting older hardware to listen for your voice all the time as iDevices do.

Think of Siri for Mac as a voice-controlled version of Spotlight with a few extra capabilities thrown in for good measure. Both have the same integrations with services like Twitter, Rotten Tomatoes, and Wikipedia, both can search through your local files and display results based on file metadata and context, both can shoot off quick iMessages and jot down notes and reminders, and both can search for and launch apps that you've installed. But Siri is better at responding to requests delivered in natural language. Type "Apple news" or "news about Apple" into Spotlight and you'll get a couple of Web search results mixed in among the local results. Pose the same question to Siri, and it will pull up a nicely formatted list of recent news results.

The most notable difference is that, unlike Spotlight, Siri doesn't demand your attention by popping up in the center of your screen and stealing focus from whatever you're currently doing. If you've enabled the keyboard shortcut, you can hit it and keep typing or doing whatever other thing you're doing even as you boss Siri around. If you're playing a video or some music, it will pause momentarily so that it doesn't drown out your voice.

Another cool touch: if you’ve got a Mac with a fan and that fan is currently spinning loudly, triggering Siri will slow it down so that the fan noise doesn’t interfere as much with your speech. Siri has never shown up in any product with a fan before, so this is a nice common-sense addition.

Siri on the Mac can do a couple of things that the other versions won’t do. For example, macOS makes basic hardware specs like RAM and CPU name and speed available to users through About This Mac and the System Information app, so you can dig up some basic hardware and software information (it’s weird to hear Siri say things like your macOS version and build number and “16 gigabytes 1600MHz DDR3 memory”). And since the Mac’s file system is exposed, you can jump to specific folders as long as you can make Siri understand the name you’re saying.

The other nice thing about Siri searches is that hitting the little plus button at the top of your results adds a constantly updated version of the search to the Mac's Today view in the Notification Center. With this, it's possible to turn any Siri query (including queries for local files) into a semi-custom widget. The Today View/Notification Center area is and always has been one of my least-visited areas in macOS, but Siri-powered widgets make it possible to add more utility without relying on developers.

But there are also things Siri can’t do on the Mac that it can do on other platforms even though there’s no obvious reason why. Try to set a timer, and you’ll be asked if a Reminder will work instead. Try to control HomeKit accessories, and Siri will shrug (iOS, watchOS, and tvOS can all control HomeKit). All the new SiriKit stuff from iOS 10 won’t work on the Mac at all, either. Even if Apple doesn’t want to build this stuff into macOS itself, some of these commands could surely be passed off to nearby, paired phones and watches.

I’ve used Siri mostly on Macs with dual microphones—a 2012 iMac, 2013 MacBook Air, 2015 13-inch MacBook Pro, and a 2016 MacBook—or with relatively high-quality external accessories—a decent Audio Technica AT2005 USB mic and a Logitech HD C920 webcam. Testing was done mostly in rooms with low-ish ambient noise, usually just sounds filtering in through opened windows or ceiling fans/air conditioning noises. In all cases, Siri seemed about as good at understanding me as it is on my iPhone or Apple Watch, which is to say "mostly fine with just enough exceptions to be annoying." Those with older or less capable integrated and external mics and people trying to use Siri in louder places may have more trouble.

When using the integrated mics, Siri works best when you speak loudly and clearly, usually just a notch more loudly and slowly than you would in normal human conversation. Even so, it still mishears words with some frequency, which can make things like telling it to open a specific folder or to look up a specific bit of information frustrating. A request for "news about Emmys" turned into "news about enemies," and while I do like to keep tabs on what my enemies are up to, it's not really what I wanted.

If you want to use Siri in a public or noisy place, using a headset is probably your best option. Wired EarPods or third-party headsets will work well, but Bluetooth headphones (including the AirPods) have sound quality issues you won't run into on the iPhone.

Whether you use Siri for Mac will depend heavily on how and how frequently you already use Siri on Apple’s other platforms. On my phone and watch, I’m usually using it for quick things like setting timers and reminders but not for sending messages or doing searches. It’s more time consuming to actually dive into the Clock or Reminders apps, and even if Siri mishears me or malfunctions the first time I can still usually save myself some time or effort. Messages and searches, on the other hand, take longer and require some precision. Here, the Mac’s physical keyboard makes typing these things out even more convenient than on the iPhone.

iCloud Desktop and Documents

Desktop and Documents syncing (as well as "optimizing" of your Mac storage) can be managed in the System Preferences.
Files that haven't been downloaded have a cloud icon. Also notice that the Desktop and Documents folders have migrated to iCloud Drive in the sidebar.
Download files by opening them, or you can hit Download Now to pull them down manually.
By default, you'll get a message any time you try to take something out of your iCloud Drive folder.

Yosemite and iOS 8 each introduced “iCloud Drive” to their respective platforms, which is interesting not because of what the feature is (a folder) but because of what it did (gave users access to iCloud’s previously obfuscated file system). On the Mac, iCloud Drive worked much like Dropbox or other established file-syncing services; put files and folders in the iCloud Drive folder, and they would be uploaded to iCloud and subsequently downloaded to all other Macs signed in to an iCloud account.

Sierra changes iCloud Drive in two major ways. First, it doesn’t actually download files until you request them, something Apple does to save local storage space. Files present in iCloud but not on your local computer appear with a small cloud-plus-down-arrow in the Finder, and you can prompt a download either by option-clicking the file or folder and hitting “download” or by just double-clicking the file to open it. Microsoft’s OneDrive used to work more or less like this back in the Windows 8 era, while Dropbox’s “Project Infinite” promises to work the same way.

Predictably, opening an iCloud Drive file for the first time on a new Mac can feel quite slow. The delay depends both on the size of the file to be downloaded and on the speed of your Internet connection; people with large folders full of photos or documents that they want to access quickly may be better served by downloading the entire folder in advance.

The second Sierra change is “iCloud Desktop and Documents,” a feature that offers to upload a user’s Desktop and Documents folders into iCloud and syncs them across all Macs signed in to a given iCloud account.

When you enable this feature, macOS actually moves your Desktop and Documents folders into your iCloud Drive folder—the Finder will no longer show them in your user account folder, though to run scripts and Terminal commands you can still use “/Users/Andrew/Desktop” or “~/Desktop” to access the folder as you normally would. The Desktop and Documents icons in the Finder sidebar also move underneath the “iCloud Drive” header from the default “Favorites” header, though you can move them back if you’d like.

When you enable iCloud Desktop and Documents on your first Mac, the Desktop and Documents folders on that Mac become the “canonical” Desktop and Documents folders that are synced to all of your systems. When you enable iCloud Desktop and Documents on a second brand-new Mac or a Mac with a fresh installation of Sierra, you’ll see all the same files and folders pop up on your desktop and in your Documents folder (though of course you’ll have to open files or manually download them before they’re actually stored on your local disk, since that’s how iCloud works now).

Enable iCloud Desktop and Documents on a second Mac you’ve upgraded to Sierra, one that already has files in its Desktop and Documents folders, and you will momentarily panic, as all of your existing files are removed and replaced with the “canonical” iCloud versions. But don’t worry; everything that was already on your desktop has been moved to a subfolder in the iCloud Desktop folder named “Desktop – [Name of Mac].” From there, move files around however you want to reconcile the desktops on your Macs.

Moving files outside of your Desktop and Documents folders will generate the same warning messages that you see when you’re moving anything out of iCloud. (You can disable this in the Finder settings, though it’s not a bad default for people who are trying to get used to the idea that their Desktop and Documents folders live in the cloud now.)

It takes a while for your Mac to upload all your files into iCloud the first time you turn it on—the service seems reluctant to overload your Mac or to completely saturate your Internet connection, both of which can easily happen while syncing a service like Dropbox for the first time. Going to the iCloud Drive folder in the Finder will give you status updates as well as show you how much storage space you have left in your iCloud account.

Turning on iCloud Desktop requires enough iCloud storage space to fit everything; for the sake of convenience, we’ll reprint the current iCloud storage tiers here so you can figure out how much it will cost to save everything you need.

  • 5GB (free). This is the “I only have an iPhone and I basically don’t do much with it besides back it up” storage tier, which you’ll quickly outgrow.
  • 50GB ($0.99 a month). This storage tier comfortably gives you room to back up an iPhone and an iPad and use iCloud Photo Library to offload pictures from your devices, but it will probably be tight for Desktop and Documents usage.
  • 200GB ($2.99 a month). This should be enough storage for many people—more than enough for backups, light-to-medium iCloud Photo Library usage, and room for most of the stuff that you casually dump onto your desktop.
  • 1TB or 2TB ($9.99 or $19.99 a month). This is where you get into “I keep my entire digital life inside iCloud” territory.

Optimized Storage and other space-saving tricks

If you don't use applications, why not delete them? Apple's built-in first-party applications, of course, are exempt from this screen.
These views are pretty helpful—they let you see large files and old files to help you decide what to delete.

In addition to not automatically downloading all iCloud files to your disk, Sierra will do a few other things to try to manage your storage for you.

Your gateway to all of these features is under the Storage tab of the About This Mac dialog box. Sierra partitions, in addition to the typical colored bars for apps, photos, and other media, will have a varying amount of space earmarked as "purgeable." This is data that is currently stored on your Mac's disk that can safely be removed because the files also exist up on the cloud somewhere, either as something you bought from the iTunes Store, something you've put in your iCloud Photo Library, or something you've put into iCloud.

Hit the Manage button and you can do more detailed storage management. Here, you can look through large files and apps on your disk to find things you can easily delete, find space-saving settings throughout macOS and its built-in apps, and get details on exactly how much space apps like Photos and Mail are using.

Sierra and Safari do a few other clever things to help clear up disk space. If you install an app from a .pkg file, the OS will helpfully offer to delete that installer once it’s done to help free up some space. Dictionaries and fonts you don’t regularly use are downloaded on demand, a space-saving feature that continues what Apple started many releases ago when it started stripping printer drivers out of the OS itself. And if you go to download a file in Safari that you’ve already downloaded previously, Safari will get rid of the older file instead of just saving the new one with a (1) added to the filename. The new OS will clear away old partial downloads, caches, and log files if it sees that you’re running low on space.

Apple's power users are probably still going to prefer to manage their own storage—many of these features and settings err on the side of letting the operating system manage everything seamlessly, which won't be the best choice for everyone, and you may want to wait and see what others' experiences are before you let macOS take full ownership of your file management. But the recommendations are generally sound, and the amount of space that can automatically be cleared can be significant, especially for that old Mac in the corner that gets upgraded regularly but not cleaned out. The tools for manual file management should make it just a little more accessible for casual or light users to dig through their files and get rid of big old files they didn't know they had.

Continuity: Universal Clipboard

Pasting information copied on an iPhone running iOS 10.

El Capitan didn't introduce any new additions to "Continuity," the broad umbrella term Apple uses to reference features that facilitate communication between Macs and other Apple devices, but Sierra does.

The first is "universal clipboard," which will let you copy text on your phone or tablet and paste it on your Mac (and vice versa). It also works between iDevices and between Macs, so if you copy something on a desktop running Sierra you should be able to paste it on your laptop (though given the way the feature works, this often won’t be practical unless your desktop and laptop are on the same desk).

Here’s how it works (note that any time you see “Mac” below, the feature also works on iDevices running iOS 10):

  • Text or some other item is copied on one Mac. The device then advertises over Bluetooth that it has something in its clipboard, just as it would do if it had content available via Handoff. Unlike Handoff, though, there's no visual indicator on other Macs or iDevices that anything is ready to copy.
  • Hit paste on the other Mac. There's a pause that accompanies the action—nearly unnoticeable for a snippet of text or a link but long enough to prompt a little progress bar popup for larger images or big chunks of text—during which Mac #2 requests the contents of Mac #1's clipboard, and Mac #1 sends it over.
  • Though both of your devices need to be signed in to the same iCloud account to trust each other, your data never appears to touch Apple's servers—like Handoff, all communication is local. This also means that Bluetooth and Wi-Fi have to be enabled on both devices, and both devices need to be within range of each other for copying and pasting to work. You won't necessarily need an active Internet connection.

If you don't want universal clipboard to work, you can head into the General preference pane and disable Handoff. As best we can tell, there's no way to keep Handoff but not the universal clipboard.

Apple Watch unlocking

Setting up Apple Watch unlocking on a newer Mac.

If you're running macOS Sierra on a more recent Mac—one that includes support for both Bluetooth 4.0 and 802.11ac Wi-Fi, which typically means something made in 2013 or later—an Apple Watch running watchOS 3 can be used to unlock your computer in lieu of your password. I’m still hoping for TouchID or some kind of facial recognition in future Mac refreshes, but in the meantime this is the closest the Mac has come to easy automated unlocking.

You’ll need to have your Mac and your Apple Watch (and the iPhone your Apple Watch is tethered to) all signed in to the same iCloud account, and then you’ll need to go to the Security & Privacy pane in System Preferences, then to the General tab and check the appropriate box. If you happen to have more than one Apple Watch associated with your Apple ID (something likely to come up only for product reviewers and developers), you’ll be able to specify which ones can unlock your Mac. Put in your account password and any other verification requested, and now when you wake your Mac in the vicinity of your (unlocked) Apple Watch, your computer will unlock automatically.

When you wake your Mac, it will attempt to communicate with your Apple Watch. Apple uses time-of-flight-based positioning to determine how close your watch and your Mac are to each other. In short, your Mac can tell where your watch is based on how long it takes a Wi-Fi signal from the Mac to reach the watch, and it’s why Apple Watch unlocking requires 802.11ac Wi-Fi instead of just Bluetooth 4.0 like other Handoff features do. If both devices are close enough, your Mac unlocks. In practice, it usually took a 2013 MacBook Air and a 2016 MacBook each a second or two to unlock when I sat down at a table in front of them.

Your watch will buzz and give you a notification to let you know you've unlocked your Mac.

In the rare cases when Apple Watch unlocking doesn’t work, it is—like AirDrop and Personal Hotspot problems—basically impossible to troubleshoot. Testing three major operating system updates at once means I’m constantly pairing and unpairing and resetting and signing out and signing back in. That admittedly isn’t the way that most people use their Apple products, and it’s a great way to mess up Apple’s normally invisible, automated processes. Restarting everything, turning Wi-Fi and Bluetooth off and back on again, and signing out of and then back into iCloud is your best bet for fixing these issues.

When things aren’t working, the “unlocking with Apple Watch” message will appear on your lock screen for a few seconds before disappearing and presenting you with the normal password box. You can bypass this wait by starting to type, which makes the password field appear as it normally would. This at least makes it so that Apple Watch pairing problems don’t keep you from getting into your computer as quickly as you normally could.

It should go without saying, but Apple Watch unlocking only works to unlock a Mac that has already been booted and logged in to. The first time you cold boot your system, it will still require your password.

Apps: Messages

An expanded Web link.
Stickers are visible, just not sendable.

Apple has lavished attention on the Messages app in iOS 10, but the macOS version will see relatively few of those changes. Mac users will be able to see a lot of the graphical frippery sent over by iOS users, but they can’t see everything and they can send even less of it.

Mac users will get larger emoji when sending and receiving all-emoji messages, and they can add “reactions” to messages they’ve received. They’ll get richer messages when sending tweets, links, notes, or other content—these all expand to give you a preview of the content you’re receiving, as they would on Facebook Messenger or Slack.

The list of things that can be seen on the Mac but not sent is probably the longest. Macs can see “invisible ink” messages, handwritten messages, and drawings sent using the Apple Watch-esque “digital touch” feature, and they’ll be able to see stickers sent from iMessage apps, but there won’t be any equivalent to iMessage apps for macOS yet. For richer data sent using apps like Fandango or Yelp, users will see links to the app’s website that can offer equivalent information, but those services won't be able to integrate deeply into the app itself.

Then there are the things that macOS users won’t be able to send or view—the full-screen animation effects, the different “moods” for iMessage bubbles (whispering, shouting, and so on). You'll see a line of text that says "Sent with Loud effect" that tells you what's going on behind the scenes, but you can't see or send animations yourself.

Logistically, it would be pretty difficult to add some of this stuff to macOS. iMessage apps are just another iOS app extension. They’re downloaded with iOS apps and getting them onto the Mac in the first place would require a non-trivial amount of effort. Digital Touch and handwriting features work better with touchscreens. It's not the first time iOS has gotten features that macOS hasn't gotten (and if they came to macOS later on, that wouldn't be a first either), but iMessage is one of Apple's signature services, and the functionality gap here is really unfortunate.

Safari 10, Apple Pay on the Web, and Picture-in-Picture video

Confirm the transaction on your watch.

Safari 10 includes a bunch of rendering engine improvements, many of which you've had for a while if you've already been using the Safari Technology Preview in El Capitan—the list of new things in Safari 10 and the list of new things in the Technology Preview overlap a lot. In fact, the current Technology Preview build already seems to have passed the stable Safari build in Sierra (WebKit 12603.1.5 for the preview, 12602.1.50.0.8 for Safari 10).

There are three big user-facing additions. The first is Apple Pay, which will require an Apple Pay-compatible iPhone (iPhone 6 or later) or an Apple Watch as well as a Mac that supports Handoff. Retailers will be able to add Apple Pay buttons to their sites, and users will be able to confirm transactions using either TouchID on their phones or their unlocked Apple Watch. As with Apple Pay on iDevices or in stores, communications between the retailer’s site and your device is encrypted, and your actual credit card number is never given out.

If you're running Sierra, Stripe actually has a great demo page where you can try the feature out without being charged. Open the page in Safari and click the button, and the page can toss the request to an Apple Watch or iPhone, and you confirm either by double tapping the side button (on your watch) or using TouchID (on your phone) to complete the transaction. From your Mac, you can pick the device you hand the purchase off to and the card you want to use, and you can select your shipping address and shipping method.

I don't use contactless Apple Pay much in my day-to-day life, but I do use the in-app version when I can. Apple Pay in Safari is a nice extension of that. It can give you the convenience of saving your credit card information with a shopping site without the insecurity inherent in storing your credit card information with a shopping site. And if Apple Pay can keep me from creating accounts on shopping sites I never intend to visit again, so much the better.

An HTML5 video playing in Safari.
The same video, popped out with Picture-in-Picture mode.
As on iOS, the video stays anchored to one of your screen's four corners and can be resized within a certain range.
Hit the button to pop it back where it came from.

The second Safari addition is Picture-In-Picture support for HTML5 videos. Apps that use Safari’s default video player controls (Apple’s WWDC videos page is a good example ) get support for this feature for “free,” and the “JavaScript Presentation Mode API” can be used to add the control to any custom video players like YouTube’s. As in iOS, picture-in-picture mode is activated by clicking a small button, which pops a borderless floating window out of the page to hover over everything else you’re doing. The video can be stuck to one of the four corners of your screen, and it’s resizable up to a certain point. The ability to pop a video window out of a page isn’t as big a deal in a windowed operating system like OS X as it is in iOS, but it’s nice to be able to give focus to a video without having to worry about covering it up with some other window. Clicking the button again makes the video pop back into the page it was originally embedded in.

The third notable feature is support for Safari App Extensions distributed through the Mac App Store. Extensions have been a part of the browser since version 5, but these new extensions are actual native applications instead of JavaScript or HTML. According to Apple, it ought to be relatively simple to port over things like content blockers developed for iOS 9. The extensions can also be kept up-to-date automatically through the Mac App Store—extensions are embedded within larger apps, so updating an app with an extension like EverNote or 1Password will update the extension as well.

On the security front, Safari is taking a hardline stance on “legacy” plugins like Flash, Java, Silverlight, QuickTime, and others. Even when they’re installed, by default Safari won’t tell the sites that the plugin is available. Users must specifically choose to enable these plugins when they want to use them—you’ll see “click to use” boxes like the ones already common in many Flash-blocking extensions, and once you click the button you can choose to enable the plugin just this once or to enable it always for the entire site. Otherwise, sites will default to HTML5.

Some of these changes will be backported to El Capitan in a Safari update; Apple’s documentation says that app extensions will be available in OS X 10.11.5 when Safari 10 is installed. But we can’t be sure about the rest of the features—Apple's browser maintenance occupies a weird middle ground between iTunes (supports multiple versions of OS X and looks and works the same way on all of them) and apps like Mail and Photos (only updated in system updates along with the rest of macOS). Safari 9 gets updates on Mavericks and Yosemite, and those updates plug security holes and bring in performance and other rendering engine changes and improvements. But Safari 9 running on older operating systems doesn't get features like El Capitan's "pinned tabs." It's tough to say where Apple will draw that line this year.

Photos

The app will cut together semi-customizable slideshows based on Memories, but won't do the movies that the iOS version does.
Memories can be based on people, places, or dates.

As in iOS, the biggest new feature in Photos is the Memories feature. This will take groups of pictures and videos from your library based on people, locations, and times, surfacing them all so you can look through them more easily.

The app will offer to cut together short slideshows from Memories—these aren’t as dynamic or as customizable as the equivalent feature on iOS, which creates a full-on video that you can customize and share, but the idea is the same—or you can just scroll through a highlight reel of photos and videos. And it will attempt to identify people's faces so that you can find them whenever they pop up in your photo library. If two or more faces appear frequently enough in the same photos, it can even show you only the pictures in which you appear together.

The Photos app tries to do basic facial recognition to put together Memories with the same people, but its ability to do this is hit-and-miss and can be thrown off by changes in hair and lighting. If the app mistakenly identifies one person as several different people, you can merge those groups of photos using a Contacts-powered search feature, but these changes won’t sync to other Macs or iDevices even if you’re doing it using your iCloud Photo Library.

The image search function is unexpectedly cool and useful, especially if your desktop or laptop is used as a repository for years and years of digital photos. Apple has a database of as many as 4,432 distinct things that it tries to search for in your photos, and, while it’s rarely perfect at detecting anything, it can be helpful when you’ve got 2,000 pictures up in iCloud and you’re trying to find a particular one.

There’s a lot of overlap between many of those search terms, presumably so that people won’t be punished for typing the “wrong” term. There’s a lot of overlap between “restaurant” and “bar” and “taproom,” but I’d rather have overlap than not be able to find something because I was looking for it wrong. The downside to the search feature is that you can’t customize the categories or tell macOS that it has something wrong. If it misidentifies a person or object, there's nothing you can really do to "train" it. You've just got to hope that Apple can make its algorithms better at some point in the future.

The rest of the Photos app, including all the image editing options, are pretty much the same as they are in El Capitan. There’s a new “brilliance” slider that you can use to try to make pictures brighter without blowing them out, though. And Apple added a button for the same Markup tools that you can use for images in an e-mail, though—go to edit a picture and then tap the circle with three dots and you’ll have access to the built-in Markup tool as well as any photo editing extensions you have installed and enabled.

Notes

You can send invitations through Messages, AirDrop, or any of the standard social networks that Apple plumbs into its OSes.
The owner can add and remove people at will. People who have been invited to edit a file can see the other people who have been invited, but can't change that list themselves.

The main change in Notes is a real-time collaboration option. Hit the button at the top of the screen and enter some Apple IDs to invite others to view and edit the note with you. You can send anyone you’ve invited a link via one of many different apps or services, including Mail, Messages, AirDrop, Twitter, Facebook, and more.

This feature, more rudimentary than the equivalent collaborative editing in Google Docs or Microsoft Word or Apple’s own Pages, seems designed to replace a certain kind of casual Google Docs usage. Sometimes you just want a basic scratchpad you can share with one or two other people while you’re trying to plan things, a place where you can dump links and notes without doing a bunch of fancy formatting. You’re still going to want Google Docs or even Pages for anything much more complicated, however. Compared to either option, Notes is missing a lot of features.

Documents refresh when a new save is detected on the server, but you don’t see real-time changes. Apple offers no interface for leaving comments, you can’t view a document’s revision history, there’s no way to let someone view a note without also granting them editing privileges, and you can’t set a separate password on any of the stuff you share. But sharing things in Notes does seem like a decent way for small groups of Apple-centric users to handle simple shared notes and tasks.

Mail and Contacts

That icon will let you quickly filter mail messages.
The filtering criteria aren't customizable, but there's a decent range of useful options.

Mail gets just a handful of tweaks in Sierra, mostly cosmetic. Preferences have been shuffled around, and though it doesn’t look like Apple has given us any new preferences or taken any big ones away, lots of stuff has been moved. By default, e-mail conversations are now displayed with the oldest message in the thread at the top and newer messages underneath instead of the other way around.

The biggest functional change is the presence of a new quick filter, accessible by clicking the little circular icon at the top of your list of e-mails (in earlier betas, it looked like a funnel). These filters let you quickly look at unread messages, flagged messages, messages from VIPs, messages with attachments, messages to you specifically, and messages on which you’ve merely been CC’d. Unfortunately, these quick filters can’t be customized beyond changing your list of VIPs.

The Contacts app picks up a similarly superficial redesign. Sierra's Contacts app puts small buttons for calling, e-mailing, messaging, and video chatting with your contacts at the top of the screen rather than inline to make them easier to identify at a glance. The app would offer to do this sort of thing before, it just wasn't so neatly laid out.

Contacts with no images also get a circular gray badge with a light gradient on it instead of the flat gray icon used in El Capitan. It’s worth noting mostly because you see that version of the icon all over the place, including in Mail and Messages.

Under the hood: Gatekeeper

The typical message you see when you try to launch an unsigned app.
You can't shut Gatekeeper off from the GUI, but you can open individual apps from here if they're blocked.
You'll see this screen the first time you launch any app via that button or by right-clicking and then clicking "open."
Turn off Gatekeeper from the command line and things go back to the way they looked before.

Apple introduced Gatekeeper in Mountain Lion in 2012, both as a way to protect users from potentially malicious apps and as a way to push developers to use the Mac App Store. In light of the then-new iOS-ification of OS X, some users were worried that Gatekeeper was the first step down a road that led to a Mac that was “closed” to third-party software in the same way that iOS is “closed.” So far, though, those fears have been unfounded; most developers haven’t had a problem signing their apps to comply with Gatekeeper’s requirements, and unsigned apps have always been pretty easy to run if you really want to run them.

Sierra makes the first major user-visible change to Gatekeeper since its introduction. The Gatekeeper options in System Preferences will no longer let you choose to allow any and all apps by default. The only two options are to allow signed apps and Mac App Store apps (still the default in Sierra, as it always has been), or just those from the Mac App Store.

That doesn’t mean that unsigned apps can’t be run on Macs, though; people who are really interested in doing so have a lot of options. You can right-click any unsigned app and click “Open,” which will give you the option to bypass Gatekeeper’s protections just like you always have. When you try to open an unsigned app without right-clicking and get denied, opening the Gatekeeper UI in System Preferences will give you an option to open that specific app. And once you’ve told your Mac to run an unsigned app once, in the future it will launch and run without complaint just like any other app.

Alternatively, you can still opt to allow all apps with the Terminal command sudo spctl --master-disable, which not only disables Gatekeeper but resurfaces the old “from anywhere” option in the Gatekeeper UI in system preferences.

This tweak may renew some of the handwringing about Gatekeeper, but it shouldn’t. Apple is obviously just trying to make it more difficult for people to casually disable Gatekeeper just because they assume they don’t need it or because they've been told to by developers of unsigned apps. It’s the same thing we saw last year with System Integrity Protection—it’s on by default, there’s no dead-simple GUI control for turning it off, but switching it off via the Terminal has always been possible if you really need to disable it. Apple still knows what its power users want and need, at least when it comes to software.

Developers who sign apps for Gatekeeper will now also need to make sure that they’re signing any external plugins or other code that’s loaded, preferably by sticking it in a signed disk image. These disk images can be signed using the codesign command line utility in OS X 10.11.5 or later, and in Sierra you can verify a disk image’s signature with the spctl command.

Path randomization

This change was made to support another security change in Sierra that launches signed apps from outside the Mac App Store from a random path on your disk instead of running them from a fixed path (like, say, the /Applications folder).

For most intents and purposes, this is completely invisible to the user (who still uses the Applications folder to install and run many apps) and the system itself (which, if you use scripts or commands to find the path of a given application, still returns the expected path from Applications or whatever folder you’re running the app from). But attacks that rely on finding specific application files in specific places won't be able to do so any more.

While this move should in theory be invisible to the user, I ran into a few applications that looked around, realized they weren’t actually being run from Applications, and freaked out. One was Tunnelblick, the OS X OpenVPN client I use—it got stuck in a loop wherein it continually asked to be moved to the “Applications” folder, overwriting itself again and again without ever actually running.

Apple says that apps already installed on Macs that are upgraded to Sierra won’t be run from randomized paths, which should help to minimize some of the disruption this could potentially cause. Many Mac apps don’t really care where they’re run from—user preferences are kept someplace else, so the app can be run from pretty much anywhere without the user noticing. But as with System Integrity Protection, there will be a few edge cases where developers need to update their apps before they’ll behave correctly.

Networking: Sierra brings new IPv6 addresses

Networking sections authored by Iljitsch van Beijnum

If you've taken Apple's advice and hopped aboard the IPv6 bandwagon, you will find that the upgrade to macOS 10.12 changes your Mac's IPv6 addresses. For the past four years, under most circumstances, Macs would create two IPv6 addresses for themselves when on a local network that is IPv6-capable. The first IPv6 address is based on the MAC address that's burned into all Ethernet and Wi-Fi hardware. However, this means that ad networks and the like can track your movements around the IPv6 internet by extracting your Mac's MAC address from its IPv6 address.

To avoid this, OS X 10.7 Lion adopted IPv6 "temporary" or "privacy" addresses that change every time the system (re)connects to the network and then every 24 hours for good measure. An ever-changing IP address is great for privacy but not so great for hosting network services, since remote systems would always need to be aware of the latest address changes. So the system creates a temporary IPv6 address that it uses for outgoing connections and also a stable IPv6 address based on the hardware MAC address that can receive incoming requests.

However, this still allows some forms of tracking and scanning of address space. For instance, someone could look up the ranges of MAC addresses given out to Apple and scan for systems with IPv6 addresses based on those MAC addresses. So Apple has now adopted a new way of generating stable addresses that are not based on a MAC address. Windows has been doing this for some years. Apple hasn't published any information about how the new system works (presumably, not unlike this) and there doesn't seem to be any way to disable it. Under previous OS X versions, the IPv6 link local address (the one starting with fe80::) as well as the non-temporary address are based on the Ethernet MAC address, as shown in the output of the ifconfig command below, where they all end in 4bc3:

en4: flags=8863<up,broadcast,smart,running,simplex,multicast> mtu 1500
ether 40:6c:8f:32:4b:c3
inet6 fe80::426c:8f ff:fe32:4bc3 %en4 prefixlen 64 scopeid 0x6
inet6 2001:470:1f15:8b5:426c:8f ff:fe32:4bc3 prefixlen 64 autoconf
inet6 2001:470:1f15:8b5:dc40:e0e3:8721:5836 prefixlen 64 autoconf temporary

But under 10.12, the non-temporary IPv6 addresses also no longer bear any resemblance to the MAC address, and the stable address is now marked "secured":

en4: flags=8863<up,broadcast,smart,running,simplex,multicast> mtu 1500
ether 40:6c:8f:32:4b:c3
inet6 fe80::cc2:8615:4761:259a %en4 prefixlen 64 secured scopeid 0x4
inet6 2001:470:1f15:8b50:1491:8a3:a082:d4a2 prefixlen 64 autoconf secured
inet6 2001:470:1f15:8b50:e088:dbdc:3fbc:7f0a prefixlen 64 autoconf temporary

The link local address always remains the same. However, as the name suggests it's only used for local communication, so this doesn't create very many privacy issues. The new secured address will always be the same when connecting to the same network using the same interface, but it's different when connecting using a different network interface or when the top half of the IPv6 address (which the system learns from the local IPv6 router) changes. Unlike MAC-based IPv6-addresses, the secured addresses should not change when replacing the networking hardware, but we were unable to perform a logic board swap to make sure. After a clean reinstall the system did get new stable/secured addresses.

Explicit Congestion Notification (ECN)

Last year, Apple said it would enable ECN in El Capitan but that never happened. ECN is a mechanism that lets routers ask users and servers to slow down their up- and downloads in a controlled fashion. Before ECN, the only way to accomplish that was by simply throwing away the excess packets when data paths got congested. Read more details about ECN in our El Capitan review.

In macOS Sierra, ECN is enabled for 50 percent of TCP sessions. So should you run into a creaky old firewall that hasn't been updated in the past decade and a half (it happens), then clicking the link again will probably solve the issue. The promise of ECN is that up- and downloads will happen with fewer starts and fits because it's less likely that the system will need to figure out how to recover from losing a bunch of packets.

Bluetooth

Apple has always loved all things wireless, and recent interest in Bluetooth headphones has reached an all-time high for some reason. In Sierra, it's easier than ever to switch sound output on a Mac. Just enable "Show volume in the menu bar" in the Sound pane of the System Preferences and you'll get a little volume widget in the menu bar. Previously, clicking the widget would reveal a simple volume slider for moving the volume up and down. But you could always option-click the widget to select an audio output device. Under Sierra, engaging the option key is no longer necessary: clicking the widget reveals a little menu with a horizontal volume slider and a list of audio devices for easy switching. Option-clicking lets you select an input device, too.

Unfortunately for Bluetooth users, the list of audio devices only shows currently connected Bluetooth audio devices. You'll have to connect to those using the Bluetooth menu bar widget.

The purpose of the first Bluetooth audio devices was to let you make phone calls. So those only supported mono audio sampled at 8 kHz—in other words: phone quality audio. When stereo Bluetooth headphones came along, the new A2DP profile was created that supports 44.1 kHz stereo audio—CD quality. The default codec for compressing A2DP audio is the relatively simple SBC codec. However, if there's one thing that Bluetooth prides itself on it's support for optional features. So manufacturers are free to include additional codecs in their A2DP products. A popular high quality codec is AptX, and there's of course Apple's favorite, AAC. When you option-click the Bluetooth icon in the menu bar and select your Bluetooth headphones, you'll see which codec is being used.

If you see "SBC" but your Bluetooth headphones support AptX or AAC, you can enable this by finding Apple's Bluetooth Explorer tool and changing the Bluetooth audio settings. (Do this at your own risk, of course.) Apple's AirPods use the AAC codec out of the box.

Most Bluetooth headphones have a microphone, which you may want to use to talk to Siri under Sierra. Unfortunately, this doesn't work as well as it could. Older Bluetooth headphones switch back to the 8 kHz phone quality profile in order to use the microphone. This means first a short delay while the Bluetooth communication is reconfigured, and then Siri has to figure out what you're trying to say to her over that limited and creaky 8 kHz channel—which noticeably reduces her voice recognition accuracy. To add insult to injury, when Siri talks back to you, that happens using the same 8 kHz channel.

The good news is that recent Bluetooth headphones can do 16 kHz audio from the microphone back to the phone or computer. With such headphones, Siri on an iPhone sounds about the same over Bluetooth as over wired headphones. The American voice seems to be the highest quality, so with that one, wired is still a bit better. The Mac, however, doesn't use the 16 kHz Bluetooth profile, so over Bluetooth, Siri on the Mac sounds pretty bad. And using the Bluetooth headphones just for audio out and selecting another microphone for input doesn't help—the Bluetooth headphones still switch back to the 8 kHz profile when activating Siri. Apparently that 3.5 mm headphone jack is still good for something.

[Editor's note: Apple tells us that using 8 kHz audio for Siri over Bluetooth is intentional per the Bluetooth spec. However, the fuzziness we experienced is apparently a bug, and the company says that audio quality should improve in a future update.]

Siri over EarPods (captured using Audio Hijack):

Siri over Bluetooth (captured using Audio Hijack):

APFS: The next macOS (and iOS) file system

One of the highlight features of Sierra—if you’re the kind of geek who loves internals and under-the-hood stuff—is APFS, the new Apple File System. Though APFS is not yet feature-complete or ready for production use, Sierra ships with a developer preview version of the file system for the curious or brave user.

At some point between now and APFS’ formal release (which will come sometime in 2017), we’ll be taking a deeper dive into the file system, including both an evaluation of its features and some meaningful benchmarks. But to sate you until then—and to satisfy our own curiosity, since file systems are actually pretty exciting—we’ve been hammering on the beta for a few weeks. We've got a pretty good idea of what Apple intends to accomplish with APFS, and bugs and missing features notwithstanding, we like what we're seeing.

Apple has restricted APFS in several ways in the Sierra beta, mostly to keep people from using it on their primary drives and suffering major data loss. There are six major restrictions right now on APFS volumes:

  • You cannot use an APFS volume as a startup disk.
  • You cannot backup an APFS volume with Time Machine (Sierra will allow you to select an APFS volume as a Time Machine destination to hold your backups, but you really, really shouldn't).
  • You cannot encrypt an APFS volume with FileVault (though there are other native encryption options).
  • You cannot use APFS with Fusion Drive.
  • You cannot share an APFS volume over your network with AFP, which has technically been deprecated since Mavericks. Sharing with SMB/CIFS or NFS is fine.
  • APFS volumes are case-sensitive, no exceptions.

These restrictions apply so far only to the Developer Preview version of APFS included with Sierra for testing. Most of these restrictions (except the ones about AFP and FileVault) will be removed by the time APFS becomes a released product in 2017. Similarly, the file system’s performance and its broad feature mix aren’t necessarily representative of the finished product. For now, the APFS developer preview provides an illuminating peek into not just the way Apple’s going to change its file system priorities in the future, but also into how it’s going to try to shift some of the fundamentals of a user’s experience with their computer.

But that’s getting ahead of ourselves. Before we get into looking at APFS in Sierra, let’s take a brief detour and make sure everybody’s caught up on what’s going on inside your computer’s disk—and why a new file system is such a big deal.

What’s on that disk?

Modern storage devices are a veritable turducken of nested layers of abstraction. There’s no formalized equivalent of the OSI model for storage—the closest thing is probably SNIA’s network storage model, which still treats the underlying disk as kind of a black box—but in bastardized OSI terms, the file system sits at the storage equivalent of Layer 6, the presentation layer.

But there’s tremendous logical separation between the top-level objects we as users interact with (primarily files and directories) and the actual physical structures they’re composed of (NAND cells on a solid state disk, sectors on a spinning hard drive). The file system plays its part in abstracting away physical structure by correlating files to fixed-size chunks of space variously called "clusters" or "allocation blocks" or even (confusingly enough) just "blocks," depending on which file system you’re using. Those chunks are then correlated with addresses on the disk called "LBAs," for Logical Block Addresses. LBAs are seen by the operating system as fixed, immutable locators for physical bits on the physical disk. However, as the name suggests, they’re actually just another layer of abstraction.

(There’s a complex historical reason behind why drives present LBAs to the operating system instead of "real" physical locations, but this review is long enough already without going down that particular rabbit hole. Wikipedia is a good starting point if you want to read about the reasons why old-school fixed block addressing was abandoned for logical block addressing.)

The file system doesn’t care about anything lower than correlating clusters with LBAs—that’s where the disk drive takes over, and what the drive does is of no concern to the file system. In the case of a spinning hard disk drive, the drive controls the mapping of LBAs to physical sectors. For solid state disks, there’s even more abstraction, with something called the Flash Translation Layer constantly changing which physical pages of NAND cells are mapped to which LBAs.

A (very) simplified block chart of what goes where in the storage stack. Hard disk drives on the left, SSDs on the right. For simplicity's sake we're just calling file system allocation units "clusters" because that was short enough to easily fit in the diagram.

Years in the making

Apple has been making noises about changing the Mac's file system for more than a decade. For a long time, Sun’s ZFS was the frontrunner to replace HFS+, right up to the point where it wasn’t. Apple instead switched course to incrementally improving HFS+, most notably with the significant addition of Core Storage in OS X Lion.

Core Storage (which is properly a logical volume manager) was a massive revamp to the underpinnings of how the Macintosh operating system dealt with its disks. It introduced a matryoshka doll-esque nested container model for combining volumes (either physical or logical) together into single big logical constructs. The most visible effect Core Storage has had on the Mac is that it enables Fusion Drive to exist. After a splashy introduction, Fusion Drive has been relegated to the background in Apple’s presentations, but it’s a "just works" kind of feature that binds two separate physical disks (an SSD and a hard disk) into one volume to ostensibly give you the advantages of both, and Fusion Drives remain a staple in mid-tier iMacs and Mac Minis.

But as noted by John Siracusa a few years ago in his Lion review, Apple's file system was aged and needing replacement even in 2007, and HFS+ with Core Storage is still HFS+. It lacked a lot of buzzword features that were rapidly propagating out to other file systems, like snapshots, atomic writes, and checksumming data. It had a slow global lock design, limiting file system access to one process at a time. It could only write timestamps on files and directories in single second increments, which is a glacial age when it comes to file writes.

With ZFS out the window and Core Storage not addressing the totality of the HFS+ shortcomings, it seemed reasonable to assume that Apple was working on something file system related—and that brings us to APFS. Reportedly in the works for the past two years, Apple says APFS is intended for use as the file system on all its devices, "everything from an Apple Watch to a Mac Pro." Many of APFS’ primary features are designed specifically around the strengths and limitations of NAND-based solid state storage, which in one form or another is the preferred option for every computing device the company sells these days.

So strap on your file system cap, folks, because we’re wading in. Here’s the list of what APFS brings to the table.

APFS features: Way the hell more files

APFS uses 64-bit inodes. An inode is a special file system block that contains information about files and directories. Think of an inode like a signpost on the disk—every file and directory has its own inode associated with it, and every object’s inode holds metadata (location, timestamp, permissions, and other stuff) about the file or directory with which it’s associated. File systems that use inodes all inherently have a maximum number of allowed inodes, and after you hit that number you can’t create any more files or directories even if there’s space left on the disk.

While HFS+ uses a 32-bit integer for its max inode count, APFS uses a 64-bit integer. This means the total number of file system objects goes up from about four billion in HFS+ to about nine quintillion in APFS.

What does this mean for you? This is a feature that dovetails with snapshots and clones. No one would reasonably expect to have nine quintillion files on a home computer—that’s crazy. However, with APFS, inodes aren’t just consumed by normal files and directories. When you begin throwing snapshots and clones into the mix—especially if Time Machine eventually shifts to using snapshots—the HFS+ upper bound of four billion inodes starts to become an approachable limit. Switching to 64-bit inodes pushes that boundary way, way out so you don’t have to care.

Sparse files and lazy allocation

Funny names, simple concept: space needed by a file in APFS is claimed as it’s actually needed, rather than all up front when a file is created. If an application needs to write a gigabyte-sized file that starts out mostly empty, for example, the empty space is reserved, but notionally represented by a single range of zeros instead of actually writing out all those zeros at once. Then, as the file is filled with real data, it "fills up" its allocation. (This is coupled with careful bookkeeping by the file system to ensure it doesn’t over-allocate storage like an airline overbooking a flight).

What does this mean for you? This should mean means less time spent staring at an inscrutable beach ball if the operating system is tasked with large writes.

Process-level file system write locks

In order to prevent two applications from both writing to the same location on the disk at the same time—which would be bad!—file systems use the concept of locking. When an application or process goes to write to the disk, the file system locks that location so only the process that’s going to write to that location is allowed to write to that location. When the write is done, the lock is lifted.

With HFS+, the lock is effectively system-wide—only one process at a time is allowed to write to the disk (more correctly, the file system’s global metadata Catalog File can only be updated by a single process at a time, which in effect creates a system-wide IO lock). This isn’t necessarily as problematic as it sounds, since these operations can be pretty darn fast, but sometimes there’s a lot of reads and writes to deal with and they form a longer and longer queue, which makes the operating system sluggish or forces it to hang and show you a spinning beachball while the queue drains.

APFS institutes per-process locking so that instead of one system-wide hold, individual programs can ask for locks only on the areas to which they’re writing. This means more concurrent IO and faster draining of the disk's queue.

What does this mean for you? As with lazy allocation, process-level locking is meant to translate into less time spent staring at the beach ball at random moments of high IO activity.

Write coalescing

It’s always easier and faster to make one big write to a disk than it is to make a bunch of little writes. Every write operation has some amount of inherent overhead to it—the disk or SSD has to receive the instructions for the write, stop what it’s doing, look up where the write needs to go, and then perform the write. With a spinning disk, this involves physically swinging the read/write head over the correct track and waiting for the correct sector or sectors to rotate underneath the head; on an SSD, the controller has to query the Flash Translation Layer and potentially even perform a lengthy block erase to free space to write (though not always).

Write coalescing is one of several enterprise features that APFS adopts to speed up disk access. Rather than performing a series of sequential writes as individual operations, they are coalesced into a single write and committed to the disk as one operation. This shaves down overhead, and the savings quickly add up when dealing with large numbers of write operations.

What does this mean for you? Yet again, this should be a beach ball-reducing feature.

Nanosecond timestamps

File and directory timestamps are often ignored by most people, but time metadata is vital to a file system from a perspective of atomicity—knowing exactly when modifications occur is critical to being able to effectively manage snapshots and clones, among other things. HFS+ can only record timestamps down to the second, which is far too coarse to be useful. APFS brings timestamps that are accurate to the nanosecond—one billionth of a second.

What does this mean for you? On the surface, not much—it won’t make any particular difference in your daily usage of your computer or watch or phone. But nanosecond timestamp granularity enables a lot of other advanced features on this list to function.

Crash Protection and Atomic Safe-Save

Writes to any file system take some non-zero amount of time—they’re not instant, and power loss or any other kind of hiccup or interruption while a file system is writing to disk can be a Very Bad Thing because the hiccup can leave the file system in an invalid or inconsistent state. A half-written or corrupted file could have varying consequences depending on what file it is—from "I guess I just lost that document" to "I guess I’m reinstalling the operating system."

Modern file systems guard against this kind of thing in various ways, but the most common way is with journaling. The file system first documents the write it’s about to make in a separate record (called a journal), then performs the write. If there’s an interruption during the write, the file system can see that the journal doesn’t match its file or directory, and it can (usually) recover from the problem by abandoning the write and pretending like it never happened. Journaling works well, but it creates a "double write" overhead because the file system has to first write what it’s going to do to the journal, then actually perform the write for real.

APFS side-steps this by using a "copy-on-write" scheme when writing to the disk. Instead of first writing to a journal and then to the data part of the file system, APFS only makes one write to an empty area of the disk—even if the write is supposed to change an existing file. Once the write is committed and confirmed, APFS then updates the file or directory’s inode to point to the changes. In this way, data is never overwritten—if the write succeeds, it succeeds and the updates are made part of the file. If it fails for any reason, the write is discarded without any changes to the original file.

Similarly, "Atomic Safe Save" provides the same kind of protection to whole-file operations ("atomic" here again refers to the computing concept of atomicity, not to some kind of nuclear super-save). While Crash Protection is a "bottom-up" technology concerned with ensuring individual logical block writes complete successfully, Atomic Safe-Save is a "top-down" tool with the goal of ensuring that all the operations involved with saving, renaming, copying, or moving files and directories all finish successfully, and without altering any original file data, before they're considered complete and the file is reported to you as saved, renamed, copied, or moved.

What does this mean for you? This should translate into far fewer opportunities for corrupted files—so fewer occasions to stare mournfully at the Disk Utility application while it tells you your stuff is gone.

Fast directory sizing

This one’s easy—the method by which APFS checks the total size of a given set of directories (or even through the whole file system) has been changed so that instead of having to wade through the whole collection of metadata for every file and directory object, file sizes are stored as separate metadata (which also side-steps a potential chicken-egg locking order violation problem you run into if you’re storing file size metadata as part of file objects and you need to update a parent object with a child object’s new size).

Consequently, reading the new file size metadata is a much faster operation than before—or at least it should be. We didn't have much luck with fast directory sizing in several rounds of testing in several different APFS containers. In fact, getting the size of a 53GB test dataset consisting of about 12,000 deeply nested files and directories took several seconds longer on APFS test volumes than it did on our HFS+ SSD (even when the APFS test volume was located on the same SSD as the HFS+ volume).

When asked, Apple informed Ars that any odd or inconsistent behavior observed in APFS—like fast directory sizing not being all that fast—should be chalked up to the prerelease nature of the file system. At least for now, that’s an acceptable answer.

A short gif demonstrating how long it takes to perform a cmd-i "Get Info" task on a large folder on an HFS+ volume on SSD (left), the same folder on an APFS volume on SSD (center), and the same folder on a APFS volume on a removable USB 2.0 flash drive. The HFS+ folder reports its size immediately but takes a bit over nine seconds to display the total child object count, while the APFS folders show the size and object count at the same time after about five seconds. Interestingly, the slow USB 2.0 flash drive appears to finish first. This is likely because the HFS+ and APFS SSD volumes are actually hosted on the same SSD and the drive is performing both operations simultaneously.

What does this mean for you? Selecting a huge stack of directories and hitting option-cmd-I should result in a total size being displayed in a second or two, rather than many, many seconds—once APFS matures.

Native extended attributes

HFS+ introduced bolt-on support for extended attributes in OS X 10.4 Tiger. Extended attributes let the operating system store metadata other than standard file system metadata in a file or a directory. Among other things, this provides a home for resource forks that accompany legacy Mac files. Extended attributes were also used for lots of other things, like determining whether or not a file sits under the macOS System Integrity Protection umbrella.

APFS provides native extended attribute support, so any files with extended attributes on HFS+ will keep them on APFS.

What does this mean for you? Again, not much in your day-to-day life. But if you happen to have old files that use resource forks (and we know you folks are out there!) or any applications that require extended attributes to function, this means they’ll still work.

Space sharing

Space sharing is similar to the enterprise concept of "thin provisioning." It lets you allocate an APFS container on a disk, and then create multiple volumes inside that container, each of which can dynamically grow and shrink to take advantage of the whole container’s amount of space. This way, you don’t have to manually re-partition the volumes to shuffle free space from one to the other—they can resize themselves, up or down, as needed.

What does this mean for you? If you’re the kind of person who uses multiple partitions on your disk, this means less time policing your partitions. You just throw them all inside a space-sharing APFS container and wash your hands of it.

Native encryption

APFS encryption is a big, big topic—so much so that we’ll eventually be giving it its own article, once the file system is formally released. For now, the quick summary on APFS encryption is that rather than relying on Core Storage and FileVault for whole-disk encryption or third-party tools for per-file encryption, APFS supports three different kinds of native encryption, using either AES-XTS and AES-CBC ciphers depending on your hardware:

  • No encryption
  • Single-key file and metadata encryption
  • Multi-key encryption

The last item, multi-key encryption, comes in three different levels of obfuscation:

  • Metadata encryption
  • Per-file encryption
  • Per-extent encryption

Single-key encryption can effectively be whole-disk encryption, mimicking the functionality of FileVault today. Multi-key encryption, either of individual files or extents (an extent is a collection of APFS file system blocks), lets multiple users encrypt files (or even sections of files!) on the same volume. Alternately, it lets a single security-conscious user encrypt different objects with different keys. This is more-or-less how storage encryption in iOS works today—different "data classes" are protected by different keys derived in different ways based on when and how information needs to be accessed.

There are as many potential use cases for native multi-key encryption as there are people who want to keep their things safe from prying eyes, and while it is an axiom that nothing is safe from a sufficiently determined attacker, it’s also an axiom that sufficiently inconveniencing an attacker can make them move on to a softer target. Remember: if you find yourself standing next to a hobbit in front of a hungry dragon, you don’t have to outrun the dragon. You just have to outrun the hobbit.

Native encryption is also a major reason why APFS doesn’t do native data deduplication. However, snapshots and clones (see below) will help to at least partially fill the dedupe gap.

What does this mean for you? There are more choices for encryption, with single-key taking over the role FileVault has today. More importantly, APFS will bring a unified crypto architecture to macOS, iOS, tvOS, and watchOS.

Snapshots and clones

These are two of the more exciting APFS features. Both of them have to do with making instant copies of files, directories, or entire volumes, but the practical implementation of snapshots versus clones is different, as are the potential use cases.

Snapshots are read-only copies of an entire volume. They look and function like entirely separate volumes from the source, but they can be created instantly, as there is no waiting for anything to copy. As time passes and the source file system changes with adding files, deleting files, and the other things that happen during daily use, the snapshot consumes an amount of space equal to the total size of the changes. A brand new snapshot takes up no space, while year old snapshot on a busy file system might be very, very large. Deleting a snapshot deletes the record of changes between the time that snapshot was taken and now, freeing up space on the host volume. (If this sounds familiar, it’s because this is essentially the same idea as snapshots on ZFS and other next-gen file systems, along with shadow copies on Windows).

A snapshot is a read-only copy of the entire file system. In this example image from Apple's WWDC 2016 presentation, both the original file system at top and the snapshot at bottom are made up of the same yellow blocks on the SSD. APFS keeps track of the differences between the read-write file system and the snapshot (like the changed orange block). Snapshots also track deletions, too—any change is held onto, so that at any point you can browse through the snapshot as if it were a complete version of the original file system frozen at one point in time. You can copy individual files out of the snapshot to the read-write file system, or even revert the read-write file system to the snapshot. Though Apple is mum on the subject, the implications for Time Machine are obvious. Credit: Apple

Clones are a similar idea with a different focus—rather than being a read-only, frozen-in-time copy of a whole volume, a clone is an instantaneous copy of a file or a directory. Both the original file and its clone start out being made of the exact same file system blocks, but both are then treated as separate files and their content can diverge from each other. APFS knows which blocks are shared by the original and the clone, and which are added after the clone is created. The total amount of space consumed by a file and its clone is equal to the size of the original file plus the changes made post-clone to the original object and all of its clones.

Clones appear similar to snapshots at first, but clones are done with files and directories, not whole file systems. Further, cloned objects can be written to and edited. In this image, both the original (top) and clone (bottom) files start out being made of the same yellow blocks. The top file is edited and the orange block is added; the total amount of space consumed by both the original file and its clone is equal to the orange and yellow blocks. Credit: Apple

There are some disadvantages to APFS’ snap and clone implementation—chief among them being that snapshots and clones cannot be replicated or copied off-box, at least for now. One major use of snapshots on other file systems is to create a stable, non-active source or target for replication, and at least in its launch guise, there is no off-box functionality included in APFS’ snapshots.

Both snapshots and clones use clever file system trickery to function. It all comes back to the way in which the underlying data structures are abstracted away from the files and directories we users interact with. This is a neat development, and one we’re excited to start using—even if a lot of the use-cases for normal non-power-users have yet to be discovered.

What does this mean for you? From a day-to-day standpoint, probably not much, unless you're a developer who writes backup utilities or otherwise interfaces with the file system directly. The immediate impact is that when copying files around on the same APFS volume, the copy operation should take almost no time, because it's now automatically a clone operation. There are unanswered questions about how the introduction of clones will affect a user’s attempts to clean up their hard disk—currently, there’s no indication in the GUI or the command line to show whether a file is a clone or an original, or if it’s an original with or without clones. Deleting a clone of a 10GB file won’t free up 10GB of space—you’ll have to delete the original and all clones to reclaim everything.

Apple’s APFS documentation says "the operating system uses snapshots to make backups work more efficiently and offer a way to revert changes to a given point in time," so that’s a non-subtle hint that there’s a real possibility APFS snapshots will supplement (or even replace) Time Machine’s existing house-of-cards pile of hard file and directory links. The synergy is obvious—hourly, daily, and weekly snapshots could easily provide the same functionality that Time Machine currently uses, but presumably with a much lower chance of backups becoming corrupted or unusable.

Checksum yourself before you wrecksum yourself

APFS’ implementation of checksums deserves its own separate section, if for only because it has sparked off a lot of arguments and vitriol. One function that sometimes is and sometimes isn’t part of a file system is ensuring long-term data integrity. It’s one thing to verify writes, but it’s entirely another to provide a method to verify that when you read it back later, it matches what was written.

We typically think of data at-rest on a hard drive or SSD as being immutable and frozen, but that’s very much not the case—"bitrot," an all-encompassing name for the myriad of ways data can be corrupted while it sits on your drive, is a real thing (for far more details, consult Ars storagemaster Jim Salter’s overview on the hows and whys). To protect against bitrot in its various forms, next-gen file systems like ZFS and btrfs will checksum the data they write—that is, perform a mathematical function against each chunk of data and then store the results of that function. Then, when the data is eventually read back, it can be checksummed again, and the results compared with the original checksum. If the checksums match, there's a high degree of confidence that the data is the same now as it was when it was written; if there’s a mismatch, then it's time to restore that file from backup because it's probably been corrupted.

It’s a simple concept, but one that can be implemented in a huge variety of ways. For example, what do you checksum? Do you just checksum metadata—the inodes and the information about the file system? Do you checksum the contents of the files, too? And—though this sounds a little metaphysical—how can you be sure of what’s really real? How do you know the checksum itself wasn’t corrupted or altered by a stray cosmic ray or angry bit of radiation during the brief amount of time it sat in memory after being computed but before being written to disk?

An answer—but not necessarily the answer—is that on systems where you’re most worried about having absolutely inviolable data, you trust nothing and checksum everything, everywhere. You pick a file system that checksums metadata and file data, on a storage system that provides error-correction, with ECC RAM that also provides error correction. The problem becomes one of overhead and expense—aside from protecting from rare (but not unheard of) bit-flipping events, multiply-redundant layers of checksumming and ECC RAM are needless expenses for most home users. (As a short aside, concerns that file systems like ZFS could destroy your data if you don’t use ECC RAM are wildly off-base and incorrect.)

A second slightly-less-paranoid approach is to trust the file system, but not trust the hardware. This is the approach taken by most modern file systems, including ZFS. ZFS checksums everything and stores multiple copies of the metadata on multiple physical volumes. Because ZFS is usually deployed on commodity hardware that could be of varying quality, this approach makes sense—you never know what hardware you’re going to put it on, so you treat all hardware as if it were about to fail.

The approach Apple has picked with APFS leans on its unique position as a near-totally vertically integrated OEM—Apple trusts the hardware, and while APFS does checksum its metadata, it doesn’t spend the additional (admittedly fractional) overhead to checksum everything else. There’s logic in this position: Apple is the 800 lb. supply chain gorilla of the computing world and it has the ability and power to demand SSDs with prime batches of NAND from its suppliers, or top-shelf RAM, or really anything it wants from the myriad of companies that provide it with parts.

In discussing APFS checksumming directly with Apple, the company told Ars that user data integrity is a top priority, and that the decision to checksum metadata but not file data (and other major architectural decisions made around Sierra) are driven by decades of data on what does and does not work well with file system design.

Questions remain, though. For example, how does "trust the hardware" work for a power user who upgrades a Mac with third-party hardware? If someone replaces the SSD in their Mac Mini with a Samsung Evo 850 or whatever, have they just placed themselves at greater risk for corruption? (That question has a "yes, but" answer—yes, there's more risk, but it's still less risk than with HFS+ because HFS+ doesn't do checksums at all.)

One tack Apple didn’t take is writing multiple copies of an object’s metadata to disk. The reasoning given is simply that solid state disks offer no real way for the operating system to ensure that the multiple copies would be written to different physical NAND cells—and that concurrent writes are in fact often grouped into the same cell. Writing two redundant copies to the same physical location kind of defeats the purpose of having two redundant copies.

Creating an APFS volume to play with

We’re nearing the end of this section and we haven’t actually done anything with APFS yet, so let’s spend the rest of it briefly (there’s that word again—everything is relative) looking at how to create and fiddle with an APFS volume.

Note that while Apple says it intends for APFS to be a whole-ecosystem technology on everything from Macs to Watches, right now you can only test out APFS with macOS Sierra—which means on an actual Macintosh computer.

Note also that the standard prerelease caveats apply: until APFS is stable, don’t use it on any device you care about. Don’t store any data you care about on an APFS file system. Don’t count on being able to read your APFS file system if there are any OS upgrades. Do not be surprised if your APFS file system deletes itself, implodes, or otherwise spontaneously stops working. Do not taunt your APFS file system.

Your options for kicking the APFS tires are threefold:

  • Create a standard sparse bundle on an HFS+ file system and then create an APFS volume inside of it
  • Create a new partition on your computer's main internal disk and format that with APFS (maybe a little risker, but el riesgo siempre vive, right?)
  • Grab an external hard drive or USB flash drive and format that with APFS

Currently you can only create APFS volumes with the command line, but it’s a relatively straightforward process. On one of our test machines, we carved out a 60GB partition with the GUI version of Disk Utility and formatted it as a standard HFS+ volume, then took to the command line to get things rolling.

First make sure you’re not going to accidentally destroy the wrong volume by checking the name of your target with the mount command:

$ mount
/dev/disk1 on / (hfs, local, journaled)
devfs on /dev (devfs, local, nobrowse)
map -hosts on /net (autofs, nosuid, automounted, nobrowse)
map auto_home on /home (autofs, automounted, nobrowse)
/dev/disk0s4 on /Volumes/APFSTarget (hfs, local, journaled)

In the example above, disk0s4 is the volume we're going to sacrifice to the APFS gods. The next step is to format it with APFS using the command line version of diskutil:

$ sudo diskutil apfs create disk0s4 MyAPFS

The create command in this context effectively executes both the createContainer and addVolume command and gives you a single non-encrypted APFS file system named "MyAPFS" on the volume you specify. The syntax is similar if you want to format an external drive with APFS, but it’s a little different if you want to play with APFS inside of a sparse image.

You now have a new APFS volume that you can experiment with. For now, due to the mandated case sensitivity, lack of booting, and the lack of support for Fusion Drive or Time Machine, there’s not a lot you can actively do with it if you’re not a developer or a tech-curious power user.

Boom, APFS. You can get diskutil to stop nagging you with "APFS is prerelease!" confirmation prompts with this argument: "-IHaveBeenWarnedThatAPFSIsPreReleaseAndThatIMayLoseData". And they say Apple has no sense of humor!)

Encryption: Not much to say yet

Encryption options at this stage don’t yet appear to be fully implemented. A quick pass through the manpage for hdutil shows that while you can create and resize APFS volumes dynamically, specifying encryption outside of volume creation isn’t yet a "live" option on the APFS side of things (diskutil apfs encryptVolume is an invalid command, for example). However, you can create an encrypted APFS volume like so:

$ sudo diskutil apfs addVolume [device] apfs [volume name] [size, optional] fileEncryption|effaceable

The last two options—fileEncryption and effaceable—are mutually exclusive, so you pick one or the other. The effaceable option purports to create an encrypted file system with a key that can be destroyed for an immediate, high-confidence volume wipe. The other option doesn’t appear to do anything yet, resulting in a file system that shows Is encrypted = no when queried for its attributes.

Clones and snapshots

Snapshots, unfortunately, aren’t yet something you can fiddle with. The 2016 Apple WWDC APFS demonstration shows developers interacting with snapshots using the snapshotUtil command, which doesn’t appear to be present in the GM release of macOS Sierra (we’ll update this piece if it appears post-release). We’ll have to put a pin in this one and come back to it in the future once it’s implemented.

Clones, on the other hand, are implemented—though, as with the rest of APFS, they're not quite working predictably yet. On one hand, creating clones is a transparent and non-configurable process: you simply copy a file on an APFS volume using the Finder (using cp from the command line results in a traditional copy). You can clone files or directories, and regardless of the size, the operation completes nearly instantly (at least up to many dozens of gigabytes).

But on the other hand, there are some odd edge cases that we can’t quite figure out yet (and our usual tools to check into what the file system is doing haven’t yet been fully updated to work with APFS). For example, APFS appears to reject the copy operation with a "there’s no enough space" error if the copy would exceed the size of the file system, even though the clone wouldn’t take up any actual space. As with Fast Directory Sizing's distinct lack of "fast," Apple says that funky behavior at this stage should be blamed on APFS' prerelease state.

APFS isn't ready yet—but it’ll be a big deal when it is

What we’ve got today in APFS is a promise, and one that’s been a long time coming. The Mac faithful had to miss the ZFS bus and then stand at the station forever, watching other shiny file system choices drive off into the distance as the calendar pages turned. Even crusty old NTFS has gained features to surpass HFS+ in the past decade-plus, with a complex ACL security model and many other trimmings of a next-gen file system (and ReFS, Microsoft's true next-generation file system, is still waiting in the wings for its time to shine). Core Storage and all the hammering and sawing to keep HFS+ has been necessary, but that damned spinning beach ball has gotten harder and harder to stomach.

APFS is Apple’s promise that the long dark is almost over—that the nearly decade-long time of file system neglect is nearing its end, and that soon, macOS users (and iOS users, and watchOS users, and tvOS users) can join the other operating system kids out in the next-gen playground. APFS isn’t finished yet, but it ought to be by next year—and that will be a Really Big Deal.

By the time APFS rolls out for real, we hope to have spent a lot more time with more feature-complete prerelease versions. We hope Time Machine will join the APFS party. We hope that the beach ball makes fewer and fewer appearances in the middle of our work and play (at least until we accidentally disconnect the network cable with some network shares mounted). Most of all, we hope Apple will have a seamless migration path in place—Apple's stated intention is to do an in-place file system switch on every single supported Mac, iDevice, Apple Watch, and Apple TV box when APFS is ready for prime time.

Now our next-gen file system bus is finally boarding, and like Ellis Boyd Redding climbing aboard a Greyhound to set out across the border… we have hope.

Grab bag: No new OpenGL extensions

Apple is still adding new capabilities to Metal, its proprietary, low-overhead graphics API, but OpenGL support on the Mac continues to languish. The reported API level on the 2015 13-inch Retina MacBook Pro I tested was still at 4.1 with a couple of 4.2 extensions thrown in, same as Yosemite and El Capitan before it.

I hoped that dropping some older GPUs from the Mac support list might have given Apple the impetus to update OpenGL to better take advantage of newer GPUs, but at this point it seems as though the open API has been sidelined in favor of Metal; OpenGL (and, soon, Vulkan) support will continue to be better on Windows and Linux.

Disk Utility tweaks

The revamped Disk Utility from El Capitan is still here with a handful of changes. It won't break storage down by media type anymore, leaving that to About This Mac, but it will show you the amount of "purgeable" space you have.
The new pie-chart style partitioner is a little easier to parse than the old one, and it's larger too.

Disk Utility was redesigned with El Capitan, and the few tweaks Apple has made are unlikely to appease you if you miss the old version. But Sierra’s version of the disk partitioning tool is much better than the one in El Capitan, making it easier to tell where the system partition is and how much space is available on the disk.

Apple has made one major change in how disk usage is reported. The El Capitan version of Disk Utility would break the used space on your partitions down by the types of data stored on them—photos, videos, apps, and so on. You can still see that view in the Storage tab of About This Mac, but in Sierra the Disk Utility view now simply shows you "used," "free," and "purgeable" space.

Purgeable space appears to be related to some of the space-saving tricks that Sierra is pulling off—it represents data stored on your disk that can and will be removed if you start running out of space, usually because there is already a copy of that data in the cloud. There's nothing you can do to manually purge this storage via Disk Utility, though. You just need to trust macOS to handle things based on the options you've enabled.

Also worth noting: the command line diskutil can be used to format disks with the new APFS file system, but the GUI version of Disk Utility doesn’t offer it as an option. APFS is scheduled to go “mainstream” sometime next year, at which point it will become the default file system for all of Apple’s products from the Apple Watch up to the Mac Pro. Until then, Apple doesn’t want you messing with it if you don’t know what you’re doing.

More granular autocorrect

You now have three checkboxes for autocorrect instead of one, letting you keep what you want and disable what you hate.
You now have three checkboxes for autocorrect instead of one, letting you keep what you want and disable what you hate. Credit: Andrew Cunningham

One of the first things I do when I'm setting up any new Mac is disable autocorrect, both because I'm more accurate on a keyboard than I am on a touchscreen and because I type quickly enough (even with two fingers) that stuff gets autocorrected before I have a chance to say "no, I typed what I meant, thanks."

In El Capitan and previous versions, Mac autocorrect was an all-or-nothing checkbox. In Sierra, there are three checkboxes: one for correcting spelling, one for capitalizing words, and one for adding a period to the end of sentences if you tap the space bar twice. You can now disable all of them entirely or just keep the behavior that you want.

Keeping tabs on everything

Three windows. Wouldn't it be great if there was another way?
For some apps, now there is! Go to the Windows menu and hit "merge all windows" to get one big happy tabbed view.
"Document-based apps" created in Xcode can get this feature for "free" without extra effort.
A basic dummy app, tabbed.

Sierra will open the door to a whole bunch of multi-tabbed apps, much like Safari and Finder. Apple's own apps, including Maps, TextEdit, Pages, and others, are good showcases.

Most of the time, creating a new tab won't work exactly the same way it does in Safari or the Finder. There may be no obvious new tab button, and the Command-T command to create a new tab may not work. What you usually need to do is open multiple windows, go to Window on the menu bar, and hit Merge All Windows if the option is available. This will unify everything into multiple tabs on a single window, and will also often enable a new tab button as well.

It's difficult to find documentation on exactly what needs to be done to get an app to support multiple tabs if it doesn't already, but developers who make "document-based applications" in Xcode do appear to get the feature for "free" even if they don't explicitly target Sierra. I created a document-based app in Xcode and ran it, and sure enough, even a totally empty app built directly from Apple's basic template supports a tabbed view. But apps that venture far from Apple's default window style or use a lot of custom UI may need to be changed to support tabs in the first place.

Improved software that runs on coasting hardware

Sierra is a perfectly fine operating system update. Like other yearly macOS releases (and the new periodic Windows 10 releases), it makes solid improvements without pulling the rug out from under users of the current version. It cuts hardware from the support list somewhat arbitrarily, but those aging Core 2 Duo systems can’t be expected to last forever and they’ll still get El Capitan security updates for a couple of years.

As of this writing, the problem with macOS isn’t so much with its software—it’s the hardware. Consider the following:

  • Almost all of the Macs Apple sells today use one-to-three-year-old components inside three-to-five-year-old designs
  • Even a declining iPhone makes six or seven times more money for Apple than the Mac does
  • Apple is aggressively pushing the iPad as “the future of computing” with new tablet screen sizes and designs
  • Mac hardware hasn’t been so much as mentioned onstage at an Apple event in a year and a half, not since the introduction of the original MacBook. Updates have come quietly between events, and it looks like any new hardware we get this year will be released the same way
  • Sierra’s versions of Messages and Siri aren’t as capable as their iOS counterparts—even when the Mac and iOS get new features at the same time, iOS comes first
  • The PC is in decline, though the lineup still earns Apple billions of dollars a year and its sales are shrinking at a slower rate than the rest of the PC industry (up until a year or two ago, in fact, they weren’t shrinking at all).

Those facts paint a clear picture: The Mac isn’t as central to Apple’s future as it once was. Pushing new businesses like the Apple TV and the Apple Watch, as relatively uncertain as those ventures are, is a smarter move than dumping money into a stable-but-declining platform.

But.

At the turn of the decade, Apple was still pushing the Mac forward even as it aggressively improved the iPhone and introduced the iPad. Between 2010 and 2013, we got the revamped MacBook Air design that served as the template for practically every thin-and-light laptop made in the last five years; both Retina MacBook Pros, which kicked off a push toward high-quality, high-density displays in high-end laptops; thinner and lighter iMacs with significantly improved fans and cooling; and a brand-new Mac Pro which at least had the benefit of being a unique and fascinating design even if the pros it was marketed to didn’t love its compromises (the fact that Apple is selling the exact same Mac Pro with absolutely no updates, aftermarket upgrade options, or price cuts three years later ultimately proved the skeptics right).

That’s not to totally discount the Retina iMac (2014 and 2015) and the new MacBook (2015), but the rate of change has obviously slowed. Apple isn’t even giving us “boring” workaday component refreshes to keep up with new CPUs and GPUs as they’re released. You could argue that year-over-year improvements in PC CPUs and GPUs have become so minor that it doesn’t make a huge practical difference, but that’s no excuse not to give Mac buyers the newest and best their money can buy. Especially not when that’s exactly the brand reputation that Apple has been cultivating over most of the last two decades.

Sierra is fine software, but after a couple years of parity, it again feels as though it’s taking a backseat to iOS, primarily because of its half-hearted implementations of major new iOS features like Messages and Siri. The Mac is still a fundamentally stable, solid, usable platform, but its hardware is no longer running circles around the rest of the PC industry. Apple could be doing more—let's hope some of these long-rumored refreshes arrive sooner rather than later.

Listing image: Andrew Cunningham

Photo of Andrew Cunningham
Andrew Cunningham and Lee Hutchinson Senior Technology Reporter
Andrew is a Senior Technology Reporter at Ars Technica, with a focus on consumer tech including computer hardware and in-depth reviews of operating systems like Windows and macOS. Andrew lives in Philadelphia and co-hosts a weekly book podcast called Overdue.
311 Comments